When building or upgrading a mechanical keyboard, the printed circuit board, often referred to as the keyboard PCB, is the most crucial component. It’s the brain of your keyboard, the layer that connects every switch, key, and LED to your computer. If you’ve ever wondered what makes your keyboard actually work, this guide will help you understand what a PCB does, how it functions, and how to pick one that fits your build.
What Is a Keyboard PCB?
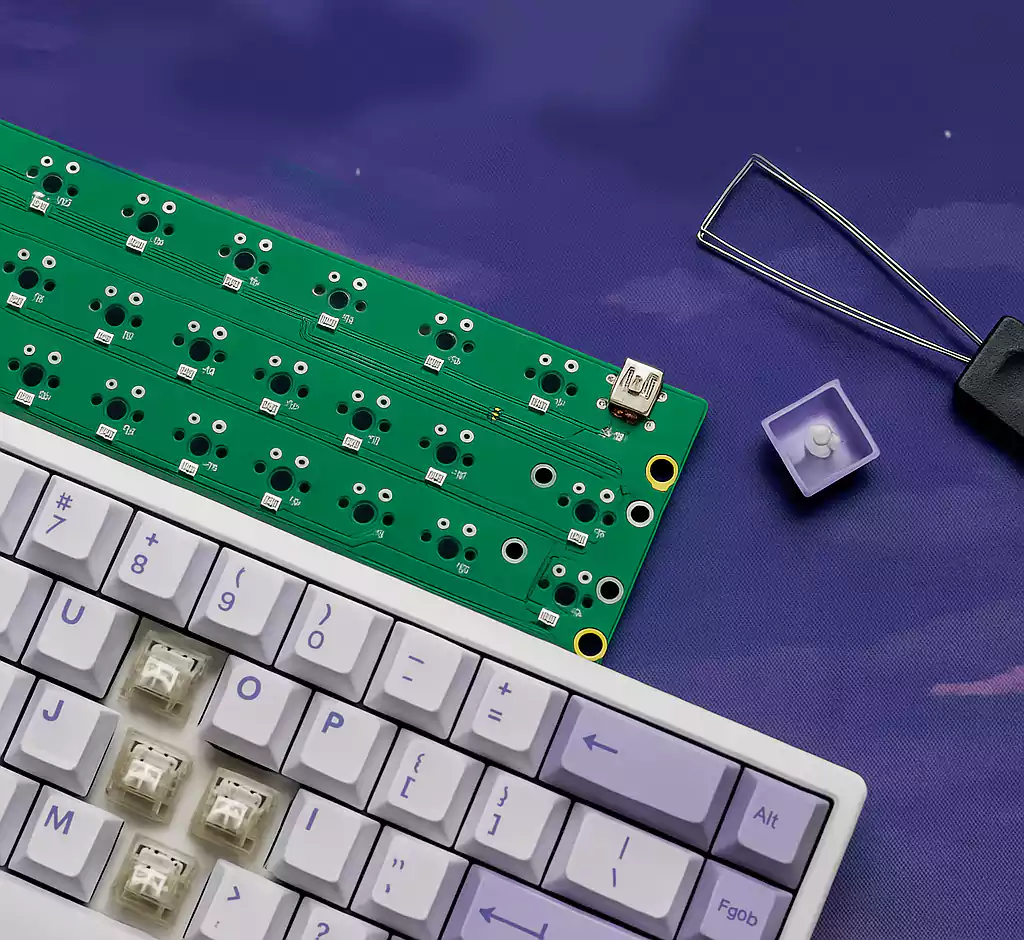
A keyboard PCB (Printed Circuit Board) is the primary electronic foundation of any keyboard. It’s a thin, flat board made of fiberglass (usually FR-4) with copper traces printed on it. These traces function like invisible wires, carrying electrical signals between your switches and the microcontroller.
When you press a key, the switch closes a circuit on the PCB, sending a signal to the microcontroller (MCU). The MCU reads that signal, tells the firmware which key was pressed, and your computer receives the input instantly.
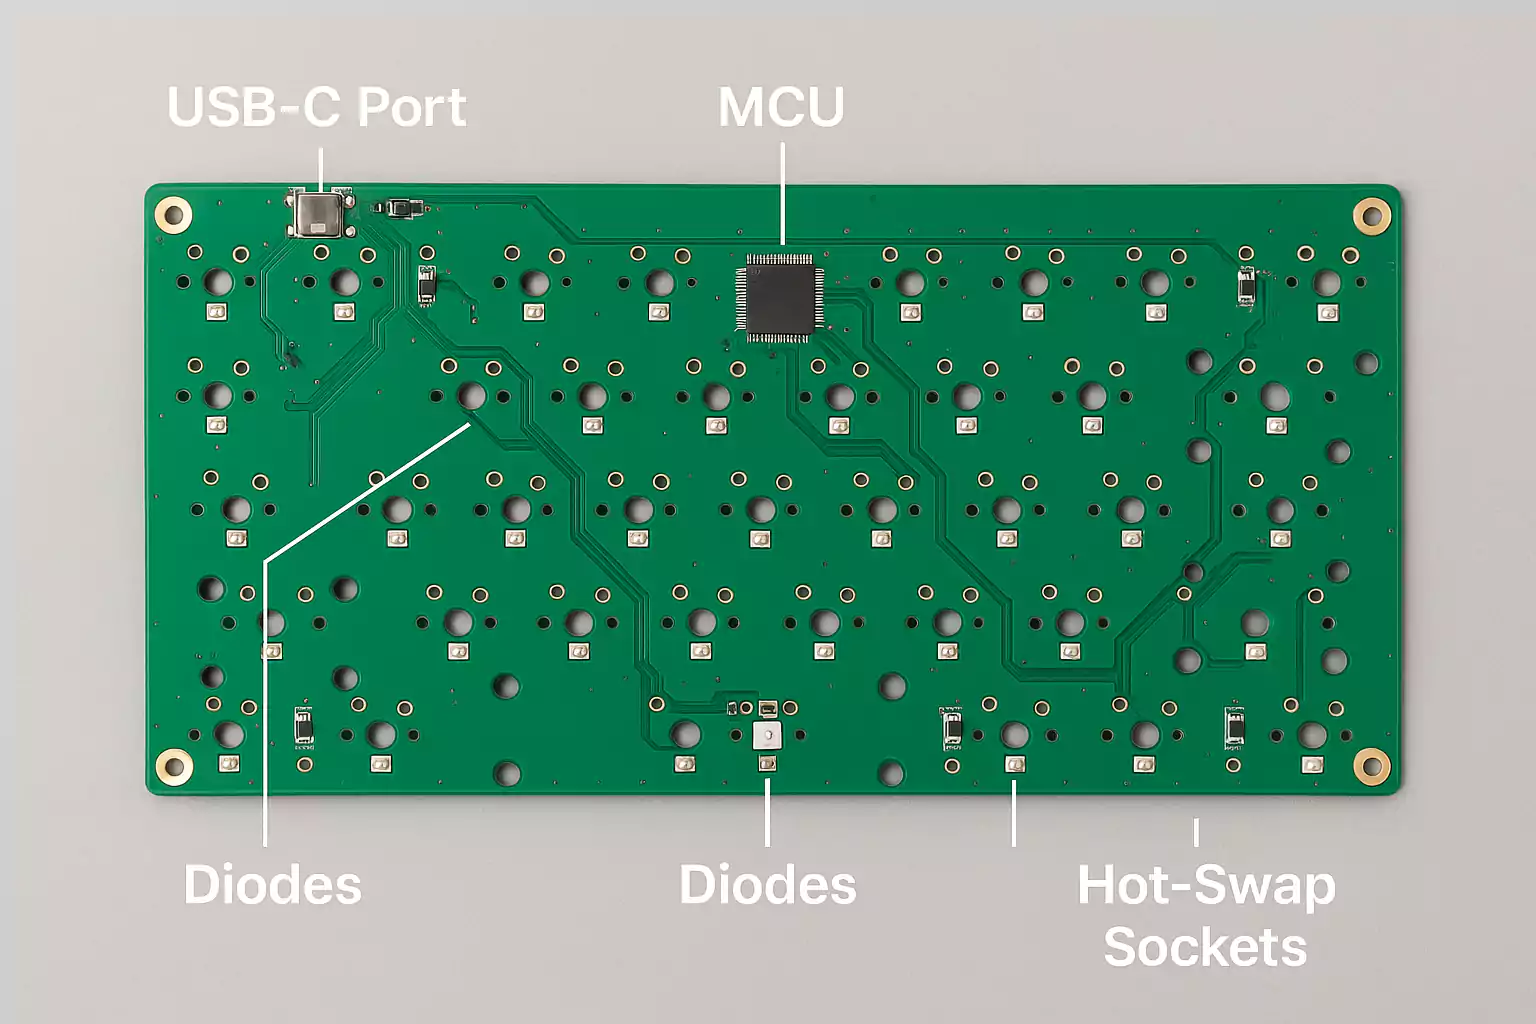
Every keyboard PCB includes a few key elements:
- Matrix traces – the network of conductive lines that connects switches in rows and columns.
- Diodes – small components that prevent “ghosting” or accidental multi-key inputs.
- Microcontroller (MCU) – the tiny chip that interprets your keypresses and communicates with your PC.
- Connector – typically a USB-C port for power and data.
- Optional extras – RGB LEDs, hot-swap sockets, and sometimes a wireless or Bluetooth module.
Because the PCB handles all communication and logic, a damaged or poorly designed PCB can make an entire keyboard unusable. That’s why testing your PCB before assembling a full keyboard is always recommended.
Hot-Swap vs. Soldered PCBs
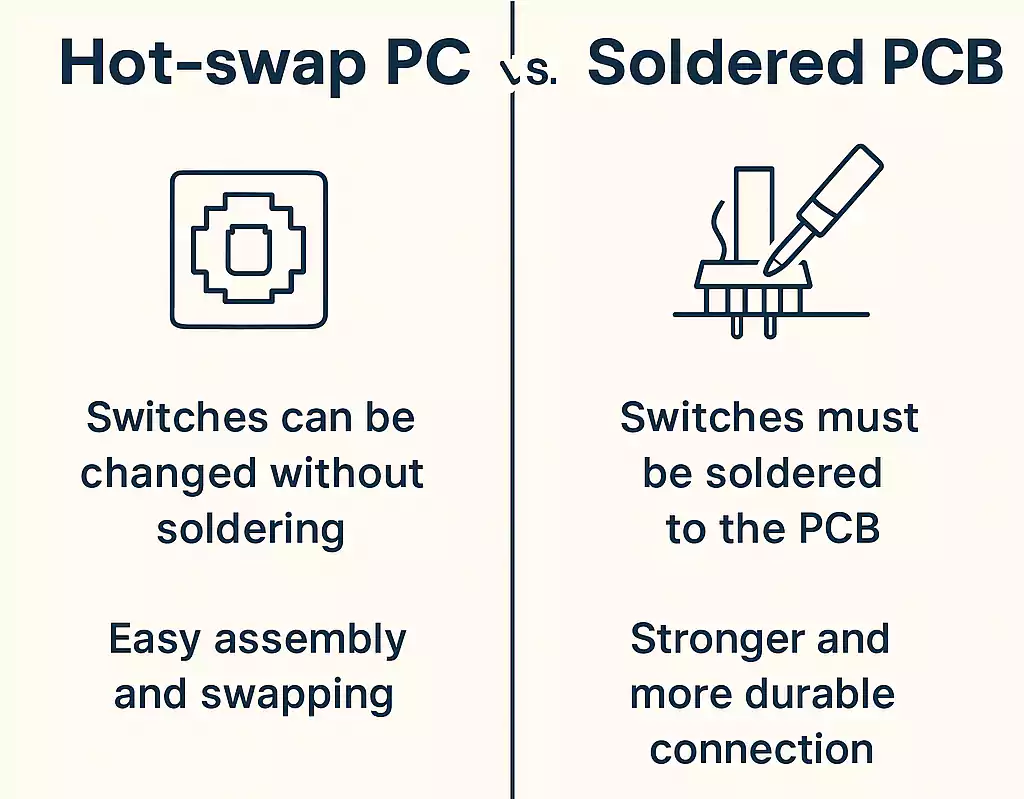
When shopping for a keyboard PCB, one of the first decisions you’ll face is whether to opt for a hot-swap or soldered design. Both types have the same basic function, but they differ in how the switches attach to the board.
Hot-swap PCBs come with small metal sockets already soldered into the switch holes. These sockets allow you to push in or pull out switches without the need for soldering. They’re perfect for beginners or for those who enjoy trying different switch types. The downside is that hot-swap sockets have a limited lifespan, and if they break or become loose, repairs can be tricky.
Soldered PCBs, on the other hand, require you to solder each switch to the board. This takes more effort and equipment, but it provides a stronger, longer-lasting connection. Soldered boards also allow more flexibility in layout and design, since manufacturers don’t need to leave room for socket housings.
How a Keyboard PCB Works
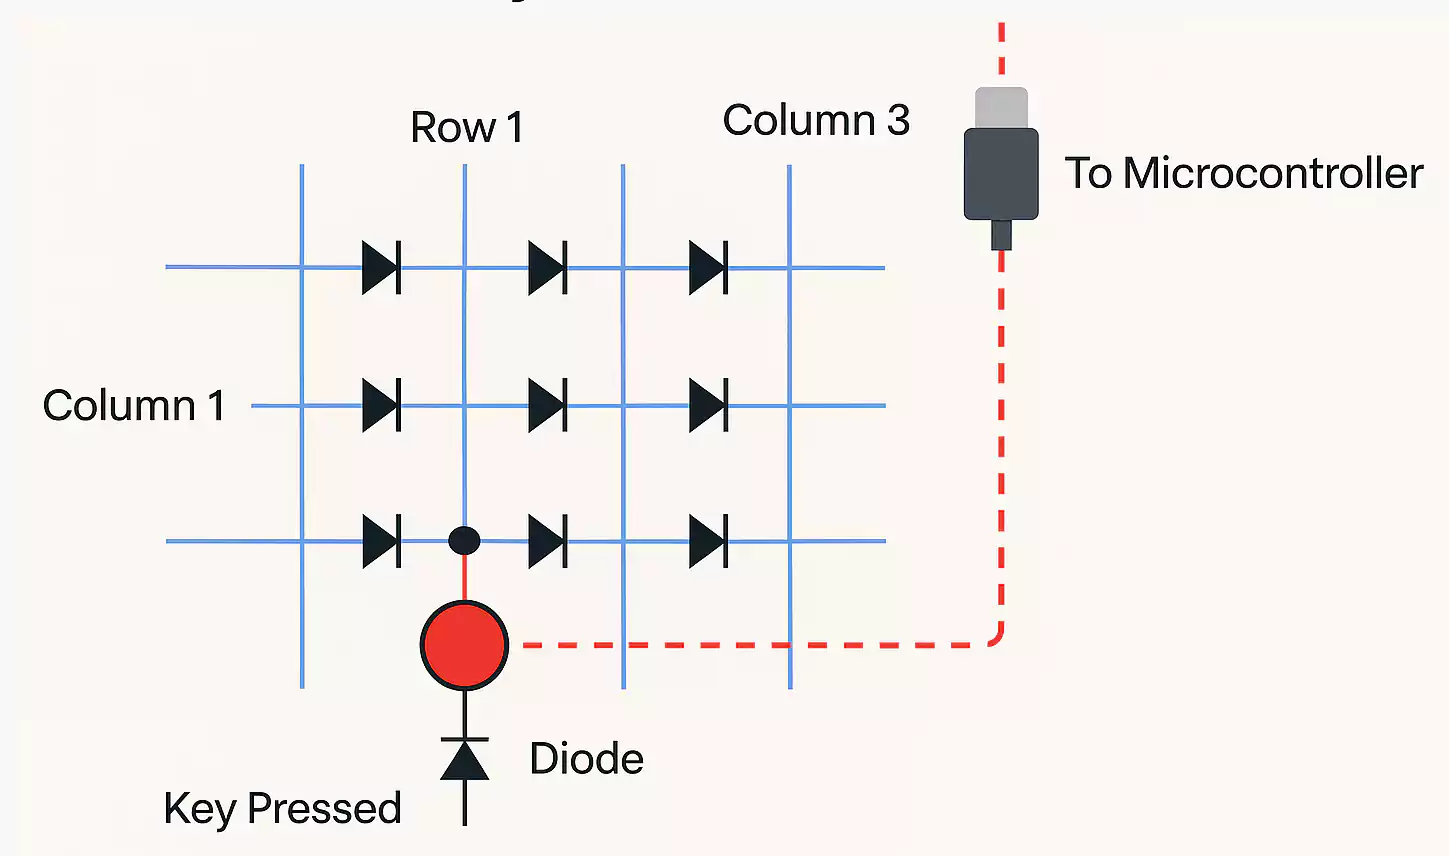
A keyboard PCB utilizes a key matrix to detect keypresses efficiently. Instead of dedicating one wire per key (which would require hundreds of wires), keys are arranged in a grid of rows and columns. When you press a key, it connects a specific row to a particular column, creating a unique signal for that key.
Diodes are added to each switch to prevent “ghosting.” Without diodes, pressing several keys at once could send extra false signals. The diodes ensure that current flows in only one direction, allowing each keypress to be read cleanly.
The microcontroller scans this matrix many times per second, a process known as matrix scanning. It looks for any closed circuits (key presses), processes that data, and sends it to the computer through USB or a wireless link.
In a hot-swap PCB, each switch pin fits into a socket instead of a solder joint. These sockets are connected to the same matrix, so the PCB reads them just as it would soldered ones.
Firmware and Compatibility: QMK, VIA, and Features
The firmware is the software that runs on your PCB’s microcontroller. It tells the keyboard how to behave, what each key does, and how lighting or macros are managed.
Most modern PCBs support QMK (Quantum Mechanical Keyboard firmware) or VIA, a user-friendly interface for customizing keymaps without coding.
- QMK provides complete control—encompassing layers, macros, lighting effects, and even advanced features like tap-dance or combos.
- VIA allows you to remap keys in real time using a graphical editor.
Some PCBs use proprietary firmware, which might limit customization or updates. Before purchasing, verify that your board supports QMK/VIA and that the correct firmware files are available.
When evaluating firmware and feature support, pay attention to:
- RGB or backlight control – Are LEDs north-facing or south-facing? The direction can affect how light hits your keycaps.
- Polling rate – A higher rate (1000Hz or more) means less input delay, useful for gaming.
- Wireless capability – Some PCBs include 2.4 GHz or Bluetooth modules, which require special firmware and antenna spacing.
- USB-C orientation and placement – Ensure the connector aligns with the opening of your keyboard case.
Compatibility Checklist: What to Check Before Buying
Before ordering a keyboard PCB, take a moment to verify its compatibility. Many build problems happen simply because parts don’t fit together.
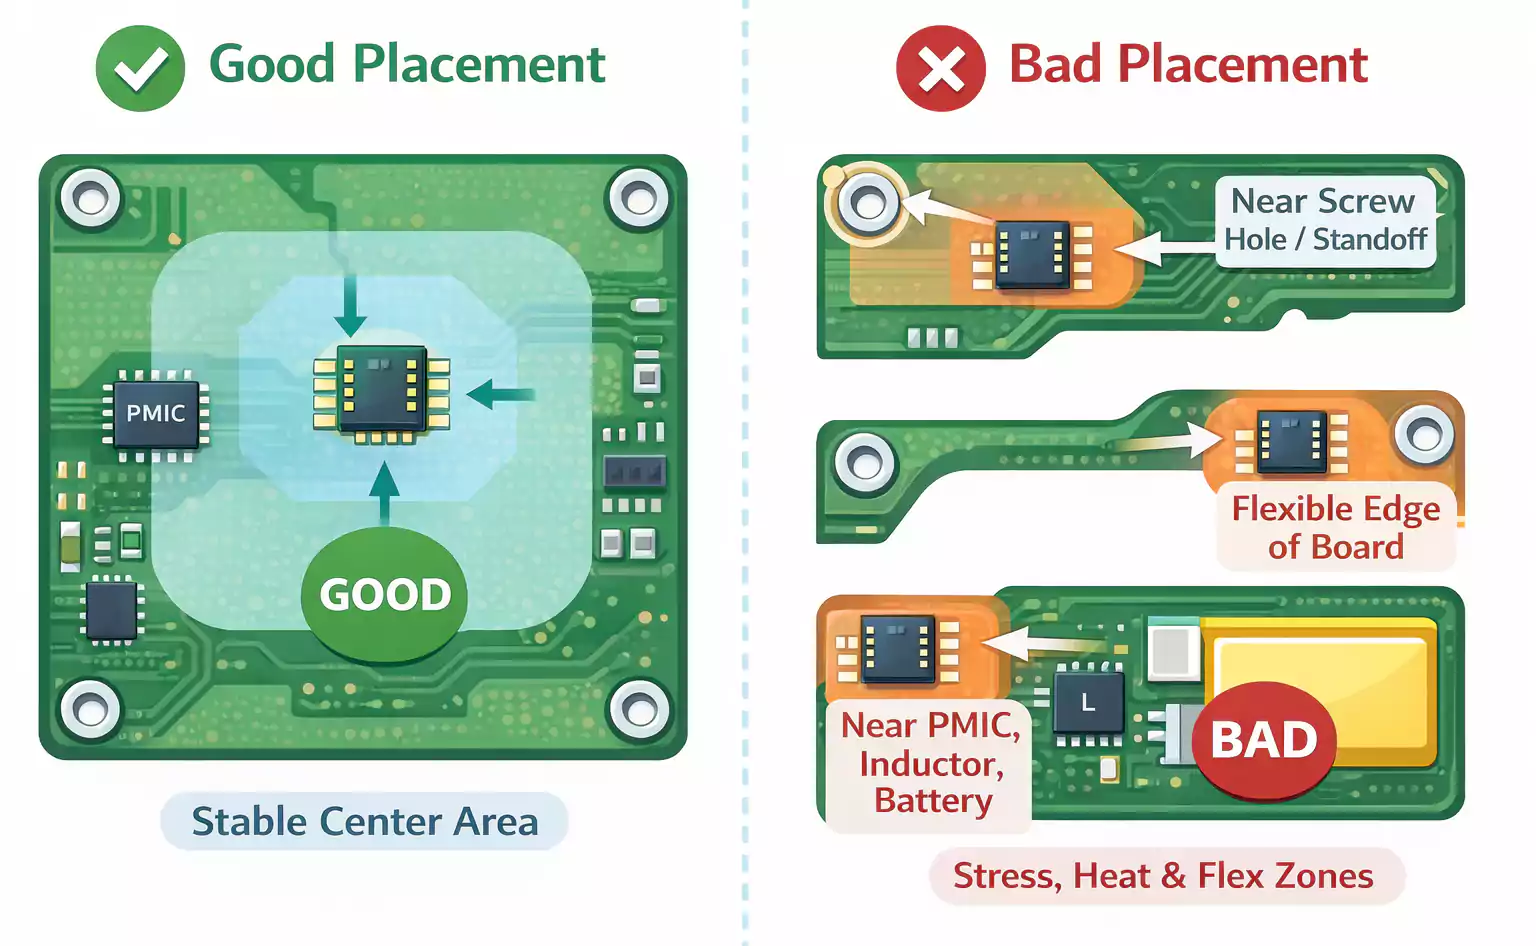
- Case and plate alignment – Check the screw holes and standoffs match your case and plate design.
- Hot-swap holes or solder points – Confirm the PCB supports your switch type (3-pin or 5-pin).
- Stabilizer mounts – Decide whether you need PCB-mount or plate-mount stabilizers.
- USB-C port location – The connector should align with the opening of your case.
- Firmware platform – Ensure that QMK/VIA support files are available for your specific PCB model.
- LED direction – North-facing LEDs may interfere with some keycaps; south-facing LEDs avoid this.
- Wireless or battery placement (if applicable) – Ensure the case has space for the module and antenna.
These simple checks can prevent costly mistakes and ensure your parts fit and function correctly the first time.
Replacement and Testing: How to Check Your PCB
Testing your PCB before complete assembly is one of the smartest steps you can take. Even reputable boards can arrive with a faulty socket, a shorted diode, or a damaged trace.
1. Visual inspection
Start by checking the board under good lighting. Look for bent pins, cracked USB ports, lifted pads, or missing components. Hot-swap sockets should sit flat and not wobble.
2. Dry testing
Use a metal tweezer or wire to short the switch pads and verify each key registers correctly in an online keyboard tester. If a key doesn’t register, note its position—it might be a loose socket or a cold solder joint.
3. Power check
Plug the PCB in and confirm the USB connection is stable. Some boards have indicator LEDs that show power or data activity. If your computer doesn’t detect the board, try using a different cable or port.
4. During assembly
Handle the PCB carefully and discharge static electricity by touching metal before working. Avoid pressing too hard when inserting switches; bending a pin can cause a short circuit.
5. Common issues
- A whole row or column not working → possible trace break or diode issue.
- Random key chatter → check for debris or poor contact in sockets.
- USB disconnection → reflow or resolder the port pads if necessary.
Emerging Notes: Hot-Swap Design and Hall Effect PCBs
Hot-swap sockets themselves are evolving. Newer models use tighter housings and thicker plating to survive thousands of insertions. Still, they remain a mechanical wear point, so always insert switches gently and straight.
Another growing topic is Hall Effect or magnetic switch PCBs. These boards detect key movement through magnetic sensors, rather than physical contacts, enabling analog control or adjustable actuation points. However, they require dedicated hardware and firmware and are not compatible with regular mechanical switches. Unless a PCB explicitly supports this technology, assume it’s designed for standard MX-style switches only.
FAQ
Does changing the PCB affect typing feel or sound?
A little. PCB thickness, mounting style, and LED direction can change the tone or flex of your keyboard, but most of the feel still comes from switches and the case design.
Can I use 3-pin switches on a 5-pin hot-swap PCB?
Yes. The extra two plastic legs simply help with alignment. You can safely use 3-pin switches without needing to cut anything.
What if VIA or QMK doesn’t recognize my PCB?
Double-check that you have the correct JSON or firmware file. Some boards require manual enabling of VIA support or flashing a QMK build using tools like QMK Toolbox.
What should I do if my PCB gets wet or shorted?
Unplug it immediately, dry it thoroughly (using isopropyl alcohol and airflow), and inspect for any signs of corrosion. Never power on a wet board—you can permanently damage the MCU.
Conclusion
A keyboard PCB may look simple, but it’s the foundation that makes every mechanical keyboard function. Understanding how it works—and what to check before buying or building—can help you avoid common problems and build a keyboard that performs exactly how you want.
Whether you choose a hot-swap PCB for flexibility or a soldered one for durability, prioritize compatibility, firmware support, and thorough testing. With a reliable PCB at the heart of your build, every keypress will feel solid, responsive, and uniquely yours.