


Introduction
Cold solder joints are a frequent yet often overlooked cause of electronic failure. From small DIY circuits to industrial-grade PCBs, these faulty connections can compromise performance, trigger intermittent issues, or lead to complete device malfunction.
A cold solder joint forms when the solder does not properly bond the component lead to the pad—typically due to inadequate heat, oxidation, or poor technique. While these joints may look acceptable at first glance, they can become problematic over time, especially when exposed to vibration, thermal cycling, or high current loads.
This article provides a complete overview of cold solder joints: what causes them, how to identify their signs, and the best practices for repair and prevention. Designed for technicians, engineers, and electronics enthusiasts alike, this guide delivers clear explanations and practical tips to help improve circuit reliability and avoid costly troubleshooting down the line.
What Is a Cold Solder Joint?
A cold solder joint is a defective electrical connection that forms when solder fails to properly melt and bond to the surfaces being joined. This usually occurs when the soldering iron doesn't provide enough heat, the contact surfaces are contaminated, or the soldering process is rushed or poorly executed.
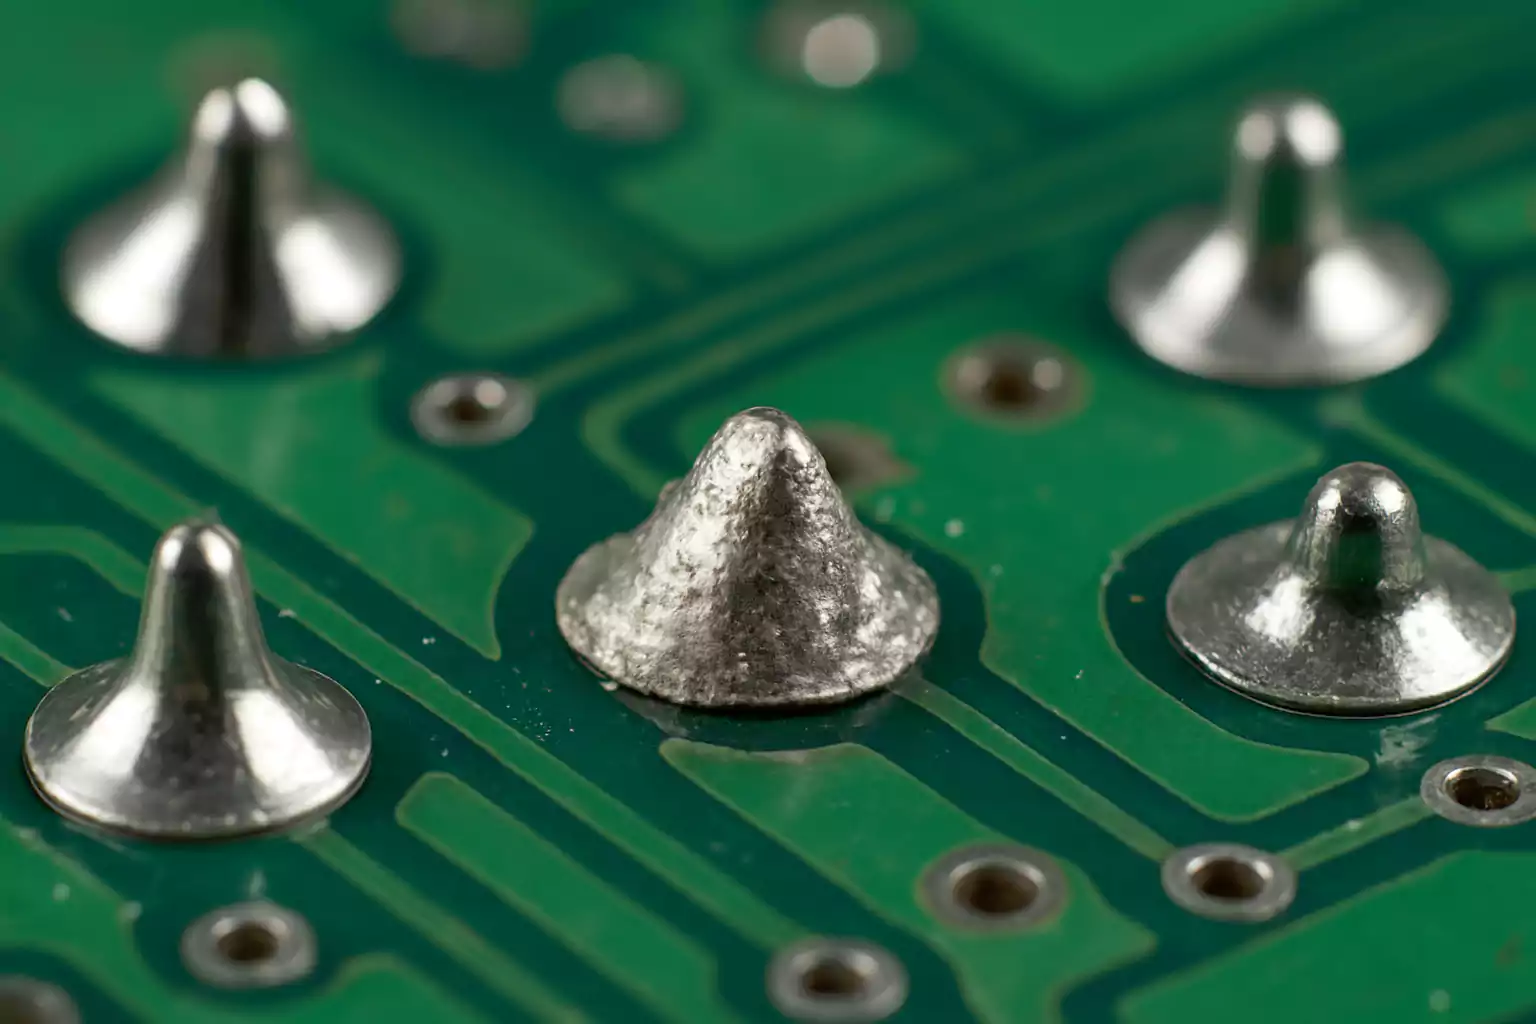
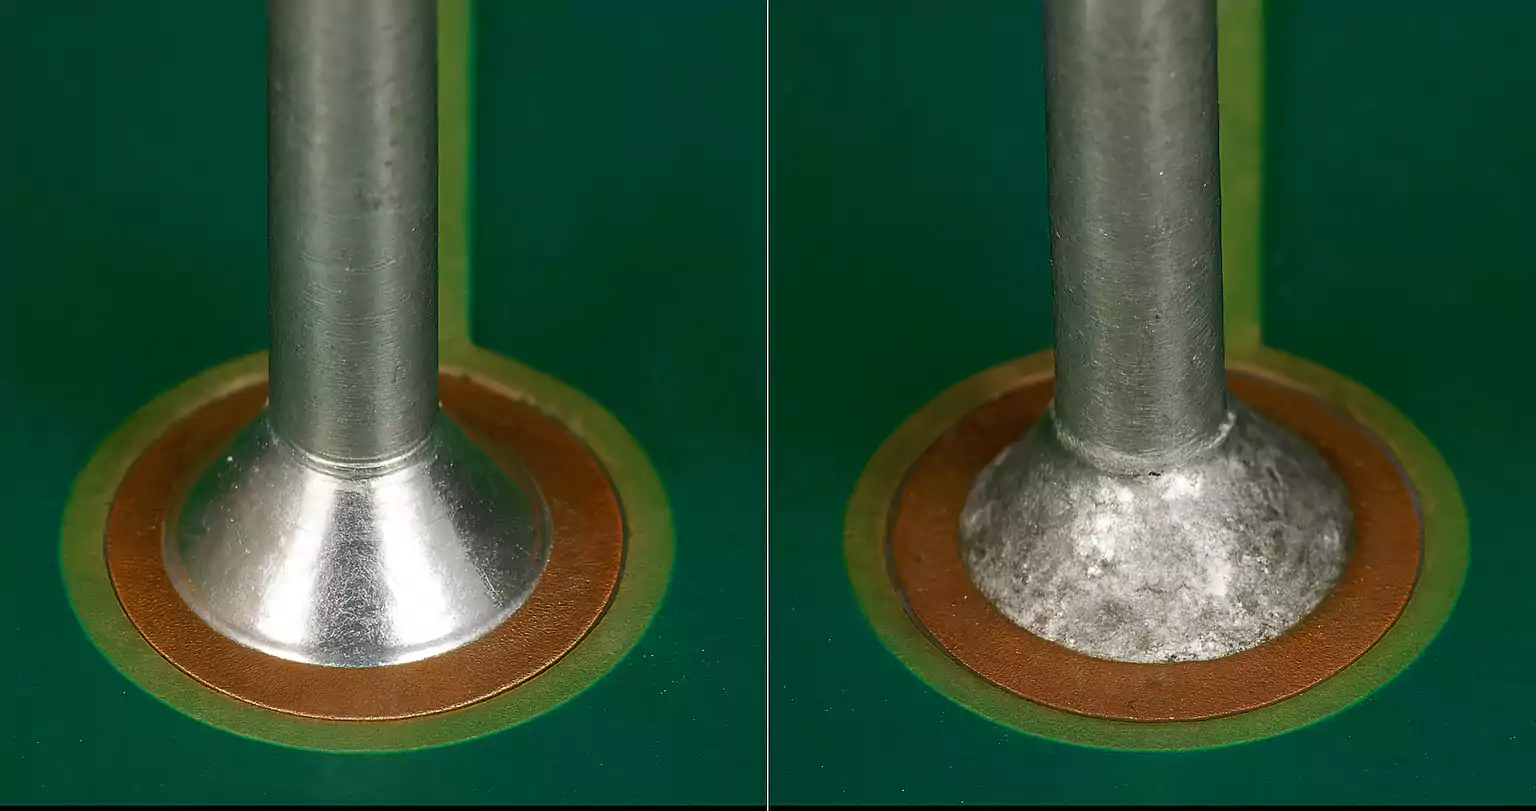
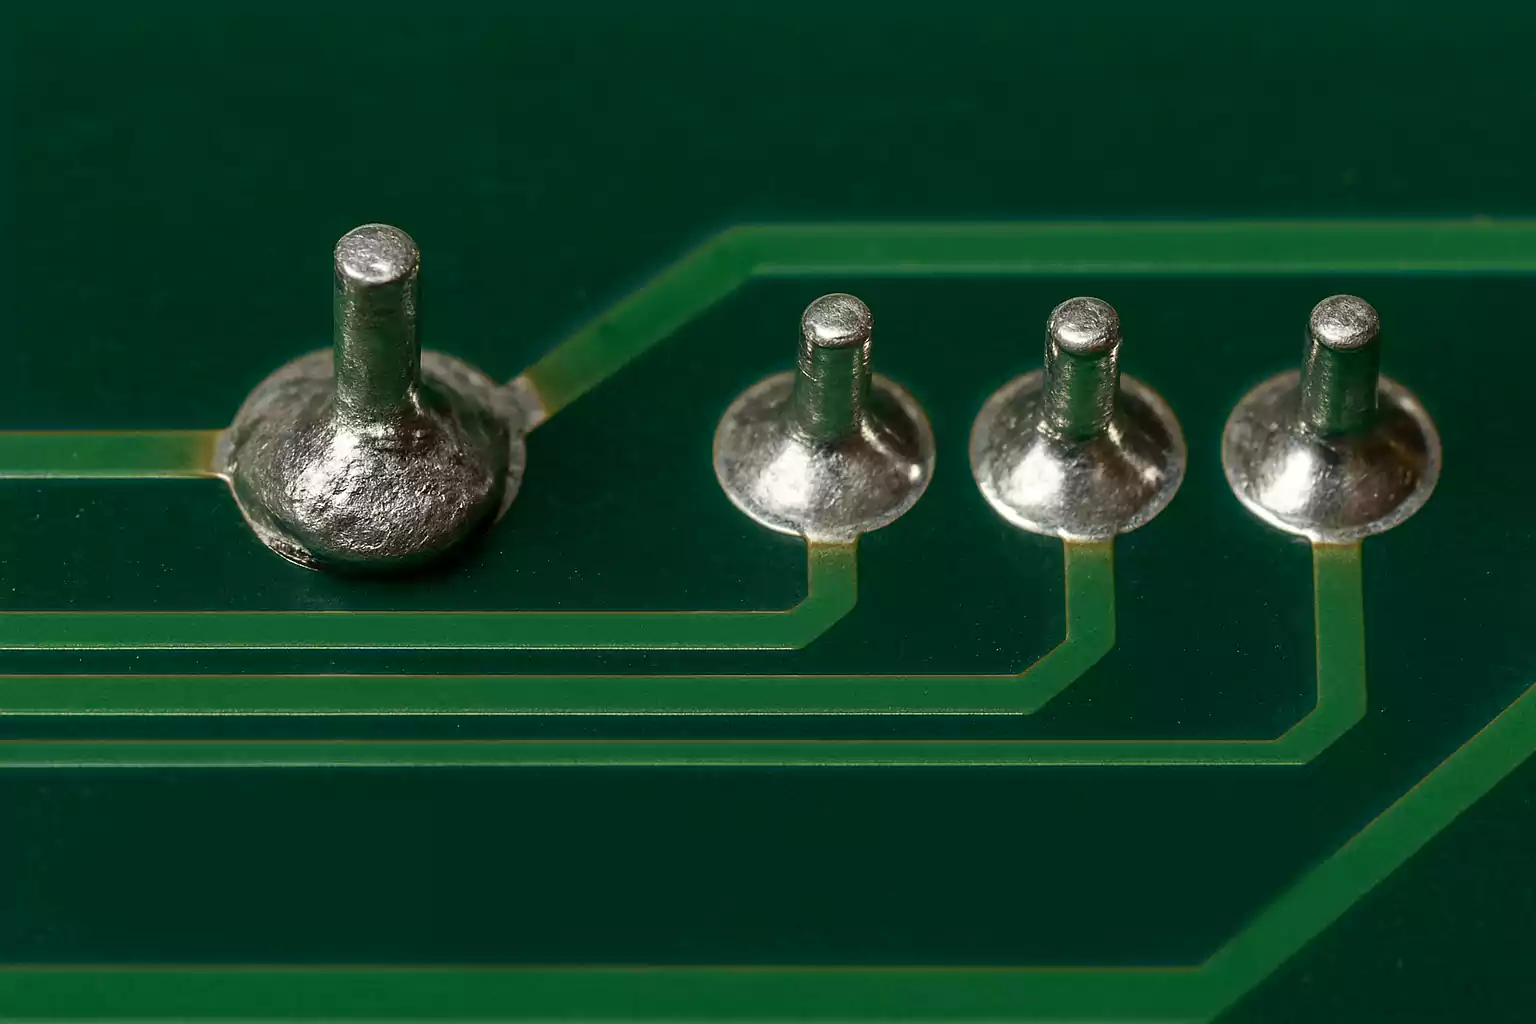
Instead of a smooth, shiny finish, cold solder joints often appear dull, grainy, cracked, or irregular in shape. These joints may look solid but are mechanically weak and electrically unreliable—leading to intermittent connectivity, voltage drops, or complete signal failure over time.
Common Causes of Cold Solder Joints:
- Insufficient heat: If the joint doesn't reach the solder's melting point, it won't flow correctly, resulting in a weak bond.
- Contaminated surfaces: Dirt, oxidation, oil, or flux residue can prevent proper wetting between the solder and metal surfaces.
- Poor soldering technique: Moving components while solder is cooling, using the wrong type of solder, or applying heat unevenly can all lead to cold joints.
- Oxidized solder tips: A dirty or corroded soldering iron tip reduces thermal transfer, preventing proper solder flow.
How a Cold Solder Joint Forms (The Principle)
For a reliable solder connection, the solder must fully melt and create a metallurgical bond with both the component lead and the PCB pad. This requires sufficient heat, time, and cleanliness. When any of these factors are missing, the molten solder may not properly wet the surfaces, leading to a weak, non-conductive joint. Over time, environmental stress—such as vibration or temperature shifts—can worsen the connection or cause it to fail completely.
Common mix-ups in soldering:
Cracked joints usually start out fine, but over time, stress or vibration can break the bond. You'll often find these in devices that get bumped around or heat up and cool down a lot.
Dry joints look a bit like cold ones, but they usually happen when the solder never properly sticks in the first place—often because of dirt or oxidation on the metal surfaces.
Solder fatigue shows up after long-term use, especially in environments where the temperature keeps rising and falling. The repeated expansion and contraction can slowly damage even a solid solder connection.
Consequences of a Cold Solder Joint
Cold solder joints might seem like a minor defect, but they can cause serious headaches—especially in systems where reliability is critical. Once a weak connection is present on a PCB, even the smallest disturbance can trigger unexpected behavior or full-blown failure.
1. Intermittent Connections
One of the most frustrating issues caused by cold solder joints is an unstable electrical connection. The joint may conduct electricity sporadically, depending on vibration, temperature changes, or even slight pressure on the board. This makes the problem difficult to trace and can lead to random resets, glitchy signals, or complete device shutdowns.
2. Increased Electrical Resistance
A cold solder joint often has a poor bond between the solder and metal surfaces, which creates high resistance. This not only reduces current flow but can also lead to voltage drops, erratic performance, and in some cases, overheating at the joint due to localized energy dissipation.
3. Complete Circuit Failure
In severe cases, a cold solder joint may completely fail to conduct electricity, breaking the circuit altogether. This can prevent a device from powering on, disable a specific function (such as a sensor or port), or cause downstream components to operate incorrectly.
4. Susceptibility to Mechanical Stress
Because cold solder joints lack strong mechanical bonding, they're much more likely to crack or break when exposed to vibration, bending, or thermal expansion. This is especially risky in automotive, aerospace, and industrial electronics, where physical durability is essential.
5. Long-Term Reliability Issues
Even if a cold joint works "well enough" at first, it can deteriorate over time. Moisture ingress, oxidation, or repeated thermal cycling can slowly degrade the joint until it fails completely—often long after the product has left the factory. This is a major concern in high-reliability applications where downtime or failure carries serious consequences.
How to Identify a Cold Solder Joint
Spotting a cold solder joint early can save hours of troubleshooting and help prevent long-term damage. These faulty connections often leave both visual and electrical clues that indicate something isn't right.
1. Visual Inspection
The first step is to carefully examine the solder joints on the PCB. Common signs include:
- Dull or grainy surface: Proper solder joints are shiny and smooth. Cold ones tend to look matte or rough.
- Irregular shapes: Misshapen, cracked, or flat joints are often unreliable.
- Poor wetting: Solder that doesn't fully bond to the pad or lead may form a blob instead of a clean connection.
- Fine cracks: Tiny ring-shaped cracks can signal a weakened or unstable joint.
2. Electrical Testing
Not all cold joints are obvious to the eye. Electrical testing adds another layer of confirmation:
- Continuity check: Use a multimeter to confirm whether the joint conducts electricity consistently.
- Resistance test: Elevated or unstable resistance across a joint can be a red flag.
- Movement sensitivity: If a circuit responds to gentle movement or pressure on a component, the joint may be compromised.
3. Advanced Inspection Methods
For critical systems or densely packed PCBs, deeper diagnostics may be necessary:
- X-ray analysis: Helps identify hidden defects in joints under components like BGAs.
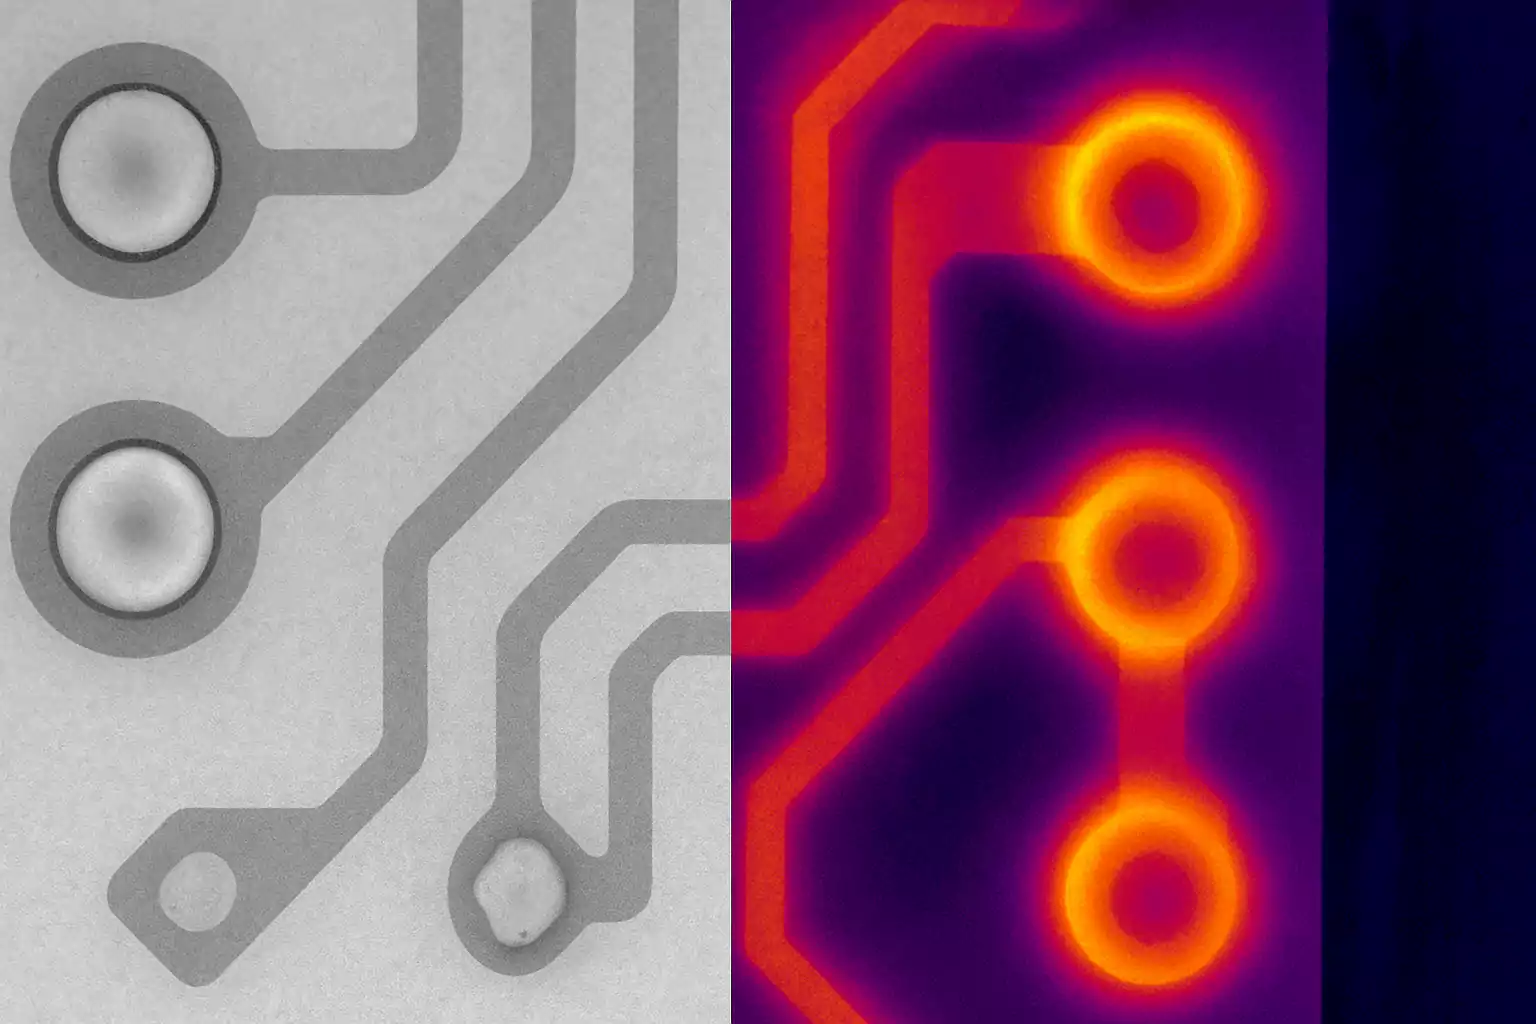
- Thermal imaging: Cold joints often show heat buildup due to poor conductivity.
- Cross-sectioning: Used in labs to study internal structure and bonding failures.
Best Practices for Preventing Cold Solder Joints
Cold solder joints are often the result of rushed work, poor technique, or inadequate tools. The good news is that most of these issues are avoidable with the right setup and consistent process. Whether you're hand-soldering a prototype or running high-volume PCB production, following best practices helps ensure strong, reliable solder joints every time.
1. Use the Right Temperature and Soldering Profile
One of the most common causes of cold joints is insufficient heat. Make sure your soldering iron or reflow oven reaches the proper temperature for your solder alloy:
- Lead-based solder (Sn63/Pb37): ~350–370 °C
- Lead-free solder (SAC305, etc.): ~370–400 °C
- Reflow profiles: The peak temperature should be at least 15 °C above the solder's melting point and held for at least 45 seconds to ensure full wetting.
2. Pre-Clean All Surfaces
Contaminants like oil, oxidation, or dust prevent solder from properly bonding. Always:
- Clean pads and component leads with isopropyl alcohol (IPA) before soldering.
- Store PCBs and components in dry, anti-static environments to minimize oxidation.
- Use flux to remove oxidation and promote wetting—especially for lead-free solders.
3. Use Quality Solder and Flux
Low-quality solder or flux can introduce more problems than it solves. Choose:
- Fresh, name-brand solder wire or paste, stored properly and within shelf life.
- Flux core solder wire for hand soldering, or apply separate flux if needed.
- No-clean or water-soluble flux depending on your workflow and application.
4. Apply Proper Soldering Technique
Consistency matters more than speed. Whether manual or automated:
- Heat both the pad and the component lead simultaneously for even flow.
- Feed solder into the joint—not directly onto the iron tip.
- Hold the iron in place until the solder fully melts and wets the surfaces.
- Avoid movement during solidification to prevent microcracks.
5. Stabilize the Workpiece
Movement during soldering can cause weak or broken joints. Prevent this by:
- Using PCB holders, clamps, or third-hand tools during hand soldering.
- Ensuring stable conveyor speeds and fixture alignment in automated lines.
- Avoiding flexing or handling of hot PCBs during cooling.
6. Inspect Every Joint—Don't Skip QA
Prevention doesn't end at soldering. Always include inspection in your process:
- Use magnification or AOI (Automated Optical Inspection) to check joint quality.
- Watch for dull finishes, cracked edges, or insufficient solder coverage.
- For mission-critical applications, consider X-ray or microsection analysis.

How to Fix a Cold Solder Joint
Even with careful soldering, cold joints can happen. The good news is—they're usually easy to repair with the right tools and technique. Below are the essential steps to rework and fix a cold solder joint effectively.
1. Identify the Faulty Joint
Before doing any rework, inspect the board carefully under a magnifier. Look for joints that appear dull, cracked, or uneven. Use a multimeter to test continuity or resistance if needed.
2. Secure the Component
Make sure the component is held firmly in place. Movement during soldering or cooling is a common reason joints fail. Use tweezers, tape, or a PCB holder to stabilize it during the repair.
3. Apply Fresh Flux
Flux helps clean the surfaces and improves solder flow. Apply a small amount of quality liquid or gel flux to the joint area before reheating.
4. Reheat the Joint Properly
Use a clean, temperature-controlled soldering iron (ideally between 350–400 °C). Touch the iron tip to both the pad and the component lead at the same time. This ensures even heat transfer and proper wetting.
5. Add New Solder if Needed
If the joint doesn't fully reflow, or if the original solder was insufficient, feed in a small amount of fresh solder. Let it flow smoothly and form a clean, concave shape around the lead.
6. Let It Cool Naturally
Remove the iron and allow the joint to cool undisturbed. Avoid blowing on it or moving the board while the solder is solidifying.
7. Inspect the Repaired Joint
Once cooled, inspect the joint again. It should look smooth, shiny, and well-formed. Check electrical continuity to confirm the fix.
Industry Variations and Specific Case Insights
Cold solder joints pose varying levels of risk depending on the industry—from minor device glitches to life-critical system failures. The table below outlines how different sectors address these risks.
| Industry | Risk Level | Common Standards | Impact of Cold Solder Joints | Typical Prevention & Inspection Methods |
|---|---|---|---|---|
| Consumer Electronics | Medium | IPC-A-610 Class 1 | Device malfunction, short lifespan, intermittent faults | Visual inspection, manual soldering, spot rework |
| Automotive | High | IATF 16949, IPC-A-610 Class 2–3 | Safety-critical systems may fail (e.g. sensors, ECUs) | AOI, X-ray, vibration & thermal cycle testing |
| Aerospace & Defense | Very High | AS9100, NASA-STD-8739.3 | Mission failure, loss of vehicle, extreme environmental exposure | Microsectioning, 100% inspection, traceability, flight-rated solder |
| Medical Devices | Very High | ISO 13485, IPC Class 3 | Life-threatening failure, regulatory non-compliance | Automated inspection, reliability validation, documented process control |
| Industrial Control Systems | High | IPC-A-610 Class 2 | Downtime, loss of precision, system resets | Thermal profiling, manual + optical inspections |
| Telecommunications | Medium | Telcordia GR-78, IPC Class 2 | Signal degradation, unstable connections in switches/routers | Reflow control, batch QA sampling, impedance testing |
| DIY / Hobbyist | Low | N/A | Minor device issues, usually fixable | Hand soldering, visual inspection, community troubleshooting |
Frequently Asked Questions (FAQ)
How common are cold solder joints?
Cold solder joints are one of the most frequent soldering defects, especially in hand-assembled or poorly controlled manufacturing environments. In high-volume automated production with proper quality control, they're less common but can still occur.
What causes a cold solder joint?
The most common causes include insufficient heat during soldering, oxidized or dirty surfaces, poor wetting, low-quality solder or flux, and movement during cooling. All of these can prevent a proper metallurgical bond between the pad and component lead.
What does a cold solder joint look like?
It usually appears dull, grainy, cracked, or irregular. Unlike a good joint that is shiny and smooth, a cold joint may also look raised, blob-like, or poorly connected to the pad or lead.
Can a device still work with a cold solder joint?
Yes—at least temporarily. Cold joints often conduct electricity intermittently, which means the device might power on and seem functional but behave unpredictably or fail under stress, heat, or vibration.
How do I test for a cold solder joint?
Use visual inspection with magnification to look for surface flaws. For confirmation, use a multimeter to test continuity or resistance. Wiggle testing or tapping the board lightly may also help identify intermittent connections.
Can cold solder joints be repaired?
Yes. Most cold solder joints can be fixed by reheating the connection, adding fresh flux, and allowing the solder to reflow properly. In some cases, old solder should be removed and replaced entirely.
Are cold solder joints more common with lead-free solder?
Yes, slightly. Lead-free solder typically has a higher melting point and less forgiving wetting behavior, making cold joints more likely if temperature and technique aren't well-controlled.
How can I avoid cold solder joints?
Use the correct soldering temperature, clean surfaces before soldering, apply flux properly, and ensure both the pad and component lead are evenly heated. Don't move components while solder is cooling.
Are cold solder joints dangerous?
They can be. In consumer devices, they might cause inconvenience or early failure. In medical, automotive, or aerospace systems, they can lead to serious malfunctions with safety implications.
Conclusion and Actionable Recommendations
Cold solder joints are a common but preventable issue that can seriously affect the reliability of electronic devices. Recognizing their causes, identifying them early, and applying proper soldering techniques can significantly reduce failure rates.
For engineers, technicians, and hobbyists alike, the key is consistency—use the right temperature, clean your components, apply flux, and avoid movement during cooling. A few extra seconds of care can save hours of rework or troubleshooting later.
In production environments, integrating visual inspection, thermal profiling, or X-ray analysis can help catch defects before products ship. For critical industries, strict process control and documentation are essential.
