Introduction
Printed Circuit Boards (PCBs) are the backbone of nearly every modern electronic device—from smartphones and computers to medical equipment and industrial machines. Over time, PCBs can accumulate dust, flux residues, moisture, and other contaminants that may compromise their performance, cause overheating, or even lead to permanent failure.
Whether you're an electronics hobbyist, a repair technician, or working in a professional lab, knowing how to clean a PCB safely and effectively is a crucial skill. Proper cleaning not only restores functionality but also extends the lifespan of your electronics and reduces the risk of short circuits or corrosion.
In this comprehensive guide, we'll walk you through the best methods to clean PCBs, recommended tools and solvents, step-by-step procedures, and important safety precautions. We'll also cover special cases like cleaning delicate components, using isopropyl alcohol (IPA), and when to avoid ultrasonic cleaning. By the end, you'll have the knowledge and confidence to clean any PCB—whether at home or in a professional setting.
Types of PCB Contamination
Before you clean a PCB, it's important to understand what kind of contamination you're dealing with. Different types of dirt and residue require different cleaning methods—and using the wrong one could cause more harm than good. Below are the most common types of PCB contamination and how they affect performance:
1. Dust and Debris
Dust is one of the most common and underestimated forms of contamination. It often settles on exposed PCBs, especially in open or poorly ventilated environments.
- Risks: While dust may seem harmless, it can trap moisture and create conductive paths between circuit traces, leading to potential short circuits.
- Identification: Fine grayish or brown buildup, often in corners or around connectors.
2. Flux Residue
Flux is used during soldering to help metals bond, but if not cleaned off afterward, it can become a source of long-term damage.
- Risks: Some fluxes are mildly conductive and corrosive over time. Residue can degrade signal quality or corrode copper traces.
- Identification: Sticky or glossy film near solder joints; sometimes white or brown residue in older boards.
3. Corrosion and Oxidation
Exposure to humidity or chemical environments can lead to metal corrosion on component leads and copper traces.
- Risks: Corrosion weakens electrical conductivity and can cause open circuits or complete board failure.
- Identification: Greenish or whitish powdery buildup, darkened copper areas, or flaking metal.
4. Moisture and Water Damage
Whether from accidental spills or high-humidity storage, moisture is a serious threat to PCB health.
- Risks: Moisture can seep under ICs or connectors, leading to intermittent performance or sudden failure after power-up.
- Identification: Residual spots, discoloration, or even corrosion if left untreated.
5. Oil and Grease
Handling PCBs with bare hands or working near machinery can lead to contamination with skin oils or industrial lubricants.
- Risks: These residues can prevent proper electrical contact or affect thermal dissipation.
- Identification: Oily fingerprints, slippery surfaces, or smudges.
6. Biological Contaminants
In long-term storage or neglected environments, PCBs can accumulate mold, mildew, or even insect debris.
- Risks: Organic growth can trap moisture and corrode metal parts. Insect droppings may also be acidic and conductive.
- Identification: Fuzzy growths, discoloration, or sticky brown/black spots.
By identifying the type of contamination on your PCB, you can choose the most effective and safe cleaning method. In the next section, we'll help you prepare the right tools and materials to begin the cleaning process with confidence.
Materials and Tools You'll Need
Before you begin cleaning your PCB, it's essential to gather the right materials and tools. Using improper equipment can damage sensitive components or leave behind residue that compromises performance. This section outlines everything you need for a safe and effective cleaning process.
🔧 Essential Cleaning Tools
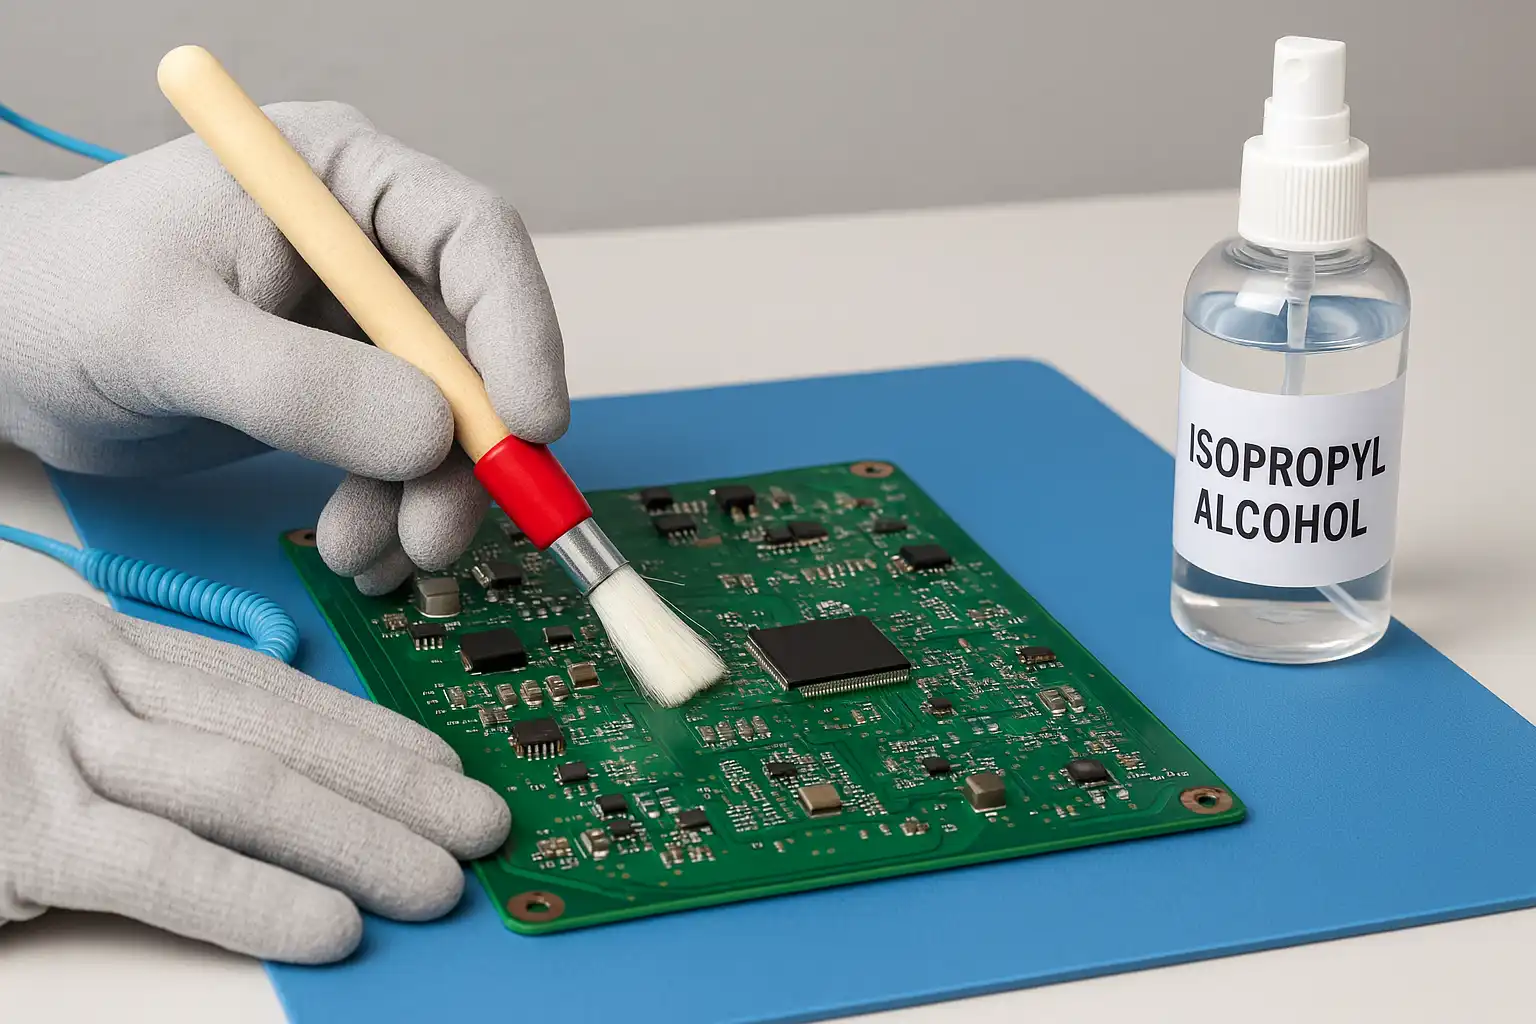
1. Soft-Bristle Brush (Anti-Static)
A small, anti-static brush is ideal for gently scrubbing off dust, dirt, or dried flux without damaging delicate components.
- Why it matters: Avoids static discharge and reaches tight spaces.
- Tip: Toothbrushes may work in a pinch but are not ESD-safe.
2. Lint-Free Wipes or Microfiber Cloths
Used to apply cleaning solvents or to gently wipe away grime without leaving behind fibers.
- Why it matters: Paper towels or cotton can leave residue that attracts more dust.
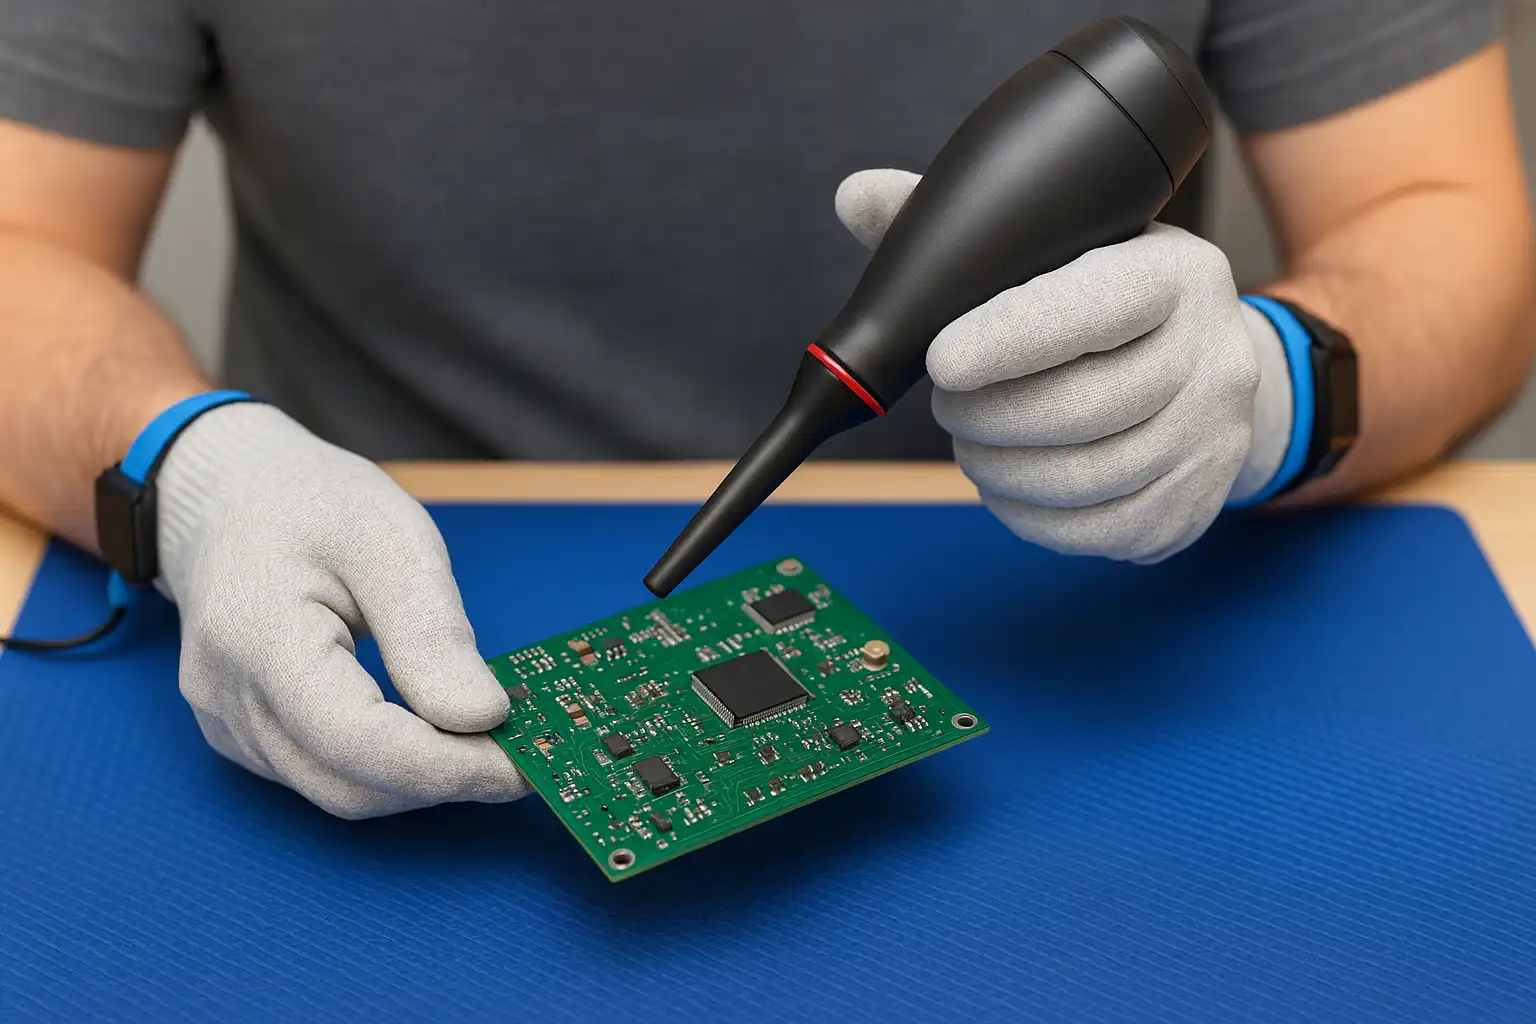
3. Compressed Air or Air Blower
Used for removing loose debris and speeding up the drying process.
- Why it matters: Helps clean hard-to-reach areas without physical contact.
- Caution: Always hold the can upright to prevent propellant spray.
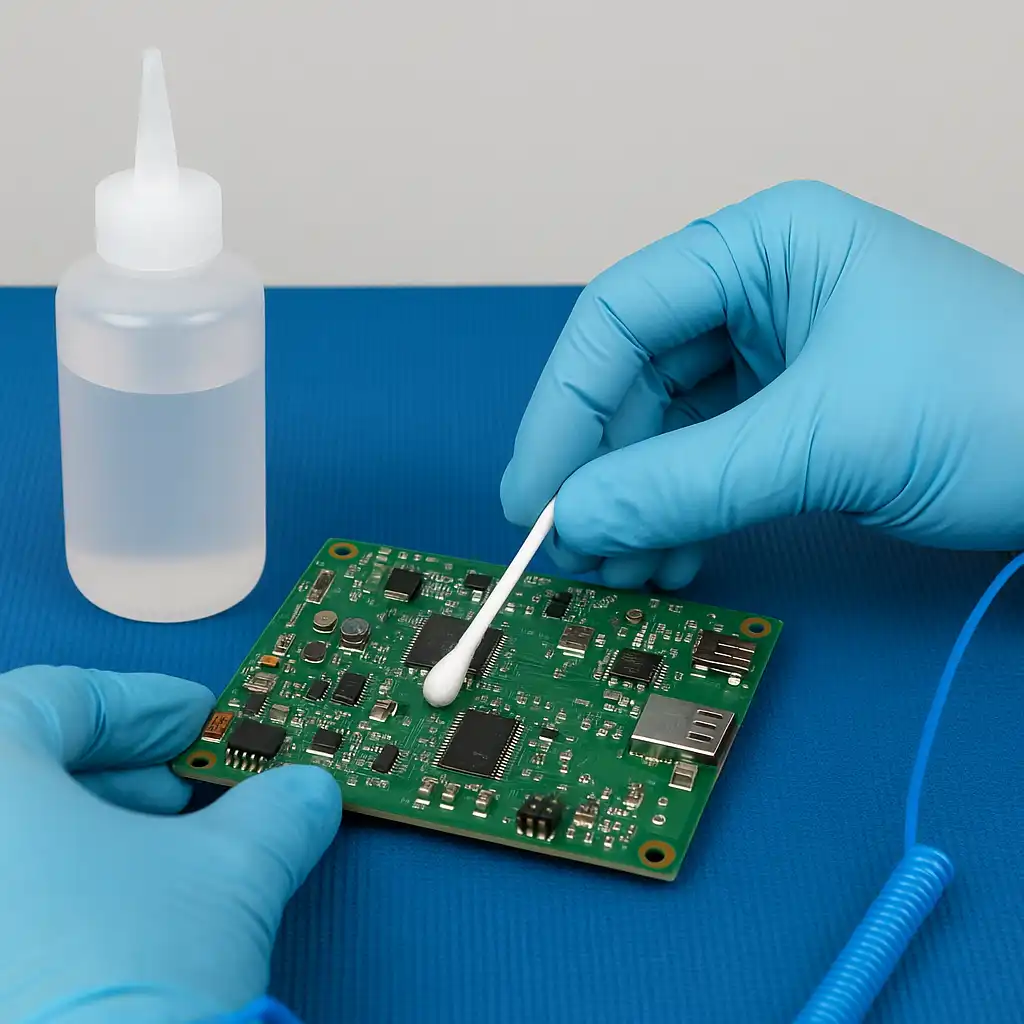
4. Cotton Swabs or Foam Swabs
Perfect for detailed spot-cleaning in small or sensitive areas.
- Tip: Foam swabs are more durable and leave less residue than cotton.
5. Tweezers and Plastic Tools
Useful for lifting components, removing debris, or handling the board safely.
🧴 Recommended Cleaning Agents
1. Isopropyl Alcohol (IPA) – 90% or Higher
The gold standard for PCB cleaning. It evaporates quickly, leaves no residue, and is safe for most electronic components.
- Why it matters: Effectively dissolves flux, oils, and other residues.
- Caution: Lower concentrations (<90%) may contain water, increasing corrosion risk.
2. Deionized (DI) Water
Used in combination with neutral detergents or after ultrasonic cleaning.
- Why it matters: Regular tap water contains minerals that can cause corrosion or conductivity issues.
- Tip: Always follow up with IPA or forced drying.
3. Commercial PCB Cleaners
Specialized cleaners designed to remove flux, grease, or corrosion.
- Popular options: MG Chemicals, Chemtronics Flux-Off, Techspray.
4. Neutral Detergent (Optional)
In some cases, a mild, electronics-safe detergent can be used for stubborn contaminants.
🧯 Safety Equipment
- Nitrile gloves: Prevent oil transfer from hands and protect your skin from solvents.
- Safety goggles: Shield your eyes from accidental splashes.
- ESD wrist strap: Ground yourself to prevent electrostatic discharge.
- Ventilation fan or fume extractor: Crucial when working with alcohol or chemical solvents in enclosed spaces.
🧰 Optional but Useful Equipment
- Ultrasonic Cleaner: For deep cleaning (used with caution—see next section).
- Drying Oven or Warm Air Blower: Speeds up drying and ensures no moisture remains under components.
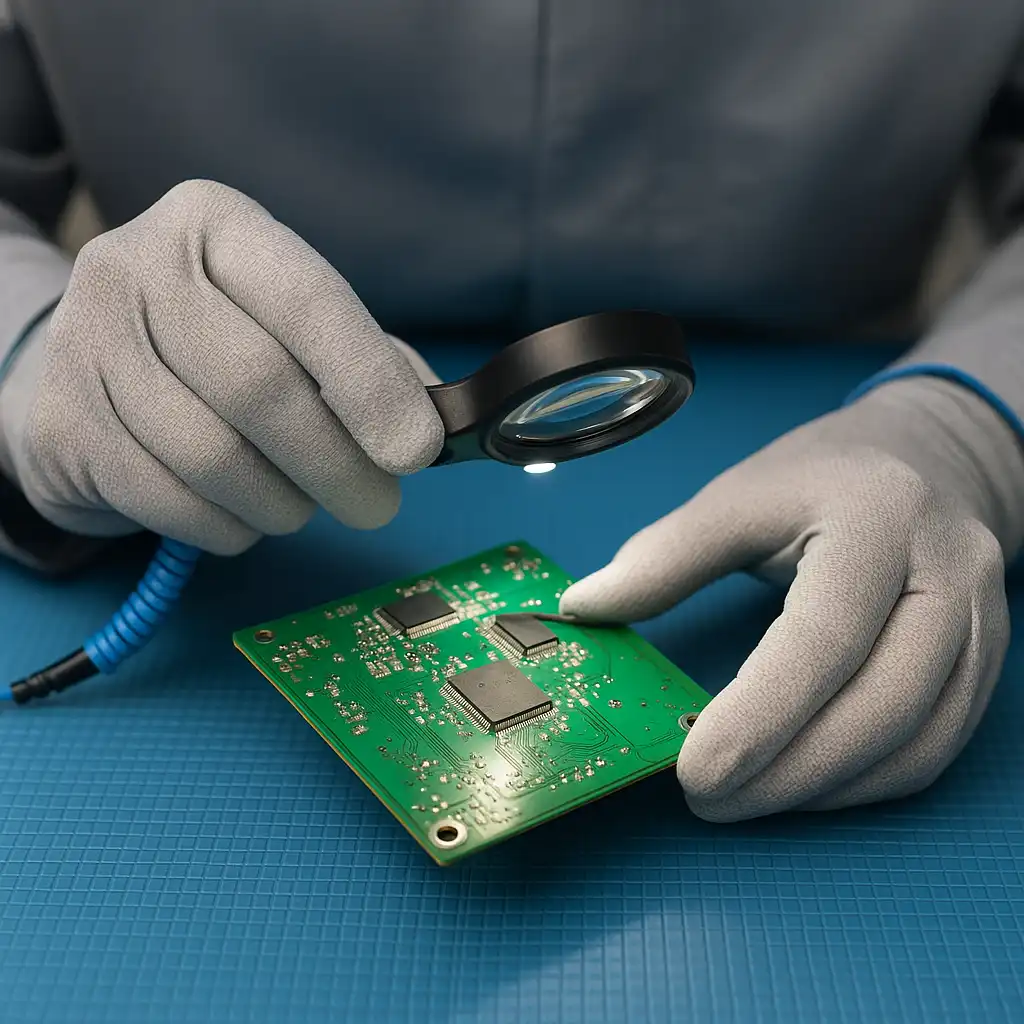
- Magnifying Lamp or Microscope: Helps inspect contamination and ensure thorough cleaning.
Having the right tools on hand not only makes the cleaning process easier but also significantly reduces the risk of damaging your PCB. In the next section, we'll guide you through how to apply these tools and materials step-by-step based on the type of contamination.
Cleaning Methods Explained
Once you've identified the type of contamination and gathered the proper tools, the next step is choosing the right cleaning method. Not all PCBs—and not all contaminants—should be cleaned the same way. In this section, we'll explain three primary cleaning techniques: dry cleaning, wet cleaning, and ultrasonic cleaning, along with their pros, cons, and best-use scenarios.
1. Dry Cleaning Method
Best for: Light dust, loose debris, surface dirt
Tools needed: Compressed air, anti-static brush, vacuum cleaner (optional)
How to do it:
- Turn off and disconnect all power sources.
- Use compressed air to blow away surface dust. Hold the can upright and spray short bursts.
- Use an anti-static brush to sweep away stubborn particles, especially around connectors and between components.
- Optionally, use a low-suction vacuum with a brush attachment to remove loosened debris.
Pros:
- Safe for all PCB types
- No moisture or residue
- Quick and easy
Cons:
- Ineffective against sticky residue (like flux or oils)
- Doesn't sanitize or remove corrosion
2. Wet Cleaning Method
Best for: Flux residue, grease, moisture stains, biological contaminants
Tools needed: Isopropyl alcohol (≥90%), lint-free cloth, swabs, soft brush
How to do it:
- Apply a small amount of isopropyl alcohol to a lint-free cloth or swab.
- Gently wipe the affected areas, working from the center outward.
- For tougher spots, use a soft brush dipped in alcohol to scrub gently.
- Use clean swabs or cloths to blot and remove loosened residue.
- Let the board air dry completely—or use compressed air to speed up drying.
Pros:
- Effective at removing flux and oils
- Fast evaporation, no residue
- Safe for most components
Cons:
- Not suitable for water-sensitive components without proper drying
- IPA is flammable and must be handled carefully
3. Ultrasonic Cleaning Method
Best for: Deep cleaning of densely populated PCBs, corrosion, or after liquid damage
Tools needed: Ultrasonic cleaner, deionized water or IPA solution, drying equipment
How to do it:
- Place the PCB into an ultrasonic cleaning tray.
- Fill with an appropriate cleaning solution (typically deionized water or IPA-based).
- Run the machine at low to moderate power for 1–3 minutes.
- Carefully remove the PCB and rinse with deionized water or alcohol if needed.
- Dry thoroughly using compressed air and/or a warm air dryer (never skip this step).
Pros:
- Penetrates under components where brushes can't reach
- Ideal for PCBs affected by corrosion or complex contamination
Cons:
- Not suitable for boards with fragile components (e.g., coils, microphones, sealed relays)
- Improper drying can lead to future failure
- Expensive equipment and setup required
Comparison Table
| Method | Best For | Risk Level | Cost | Dry Time |
|---|---|---|---|---|
| Dry Cleaning | Dust, debris | Low | Low | None |
| Wet Cleaning | Flux, oils, fingerprints | Moderate | Low-Medium | Minutes |
| Ultrasonic Cleaning | Corrosion, water-damaged boards | High | High | Several hours with drying equipment |
By choosing the right cleaning method based on the contamination and board type, you can safely restore your PCB's performance without risking further damage. In the next section, we'll walk through a step-by-step cleaning procedure you can follow from start to finish.
Step-by-Step Cleaning Procedure
Cleaning a PCB correctly requires more than just wiping off dust. This section outlines a detailed, step-by-step cleaning process to help you safely restore your circuit board's functionality. Whether you're doing light maintenance or dealing with heavy contamination, following these steps will ensure optimal results.
Step 1: Power Down and Disconnect
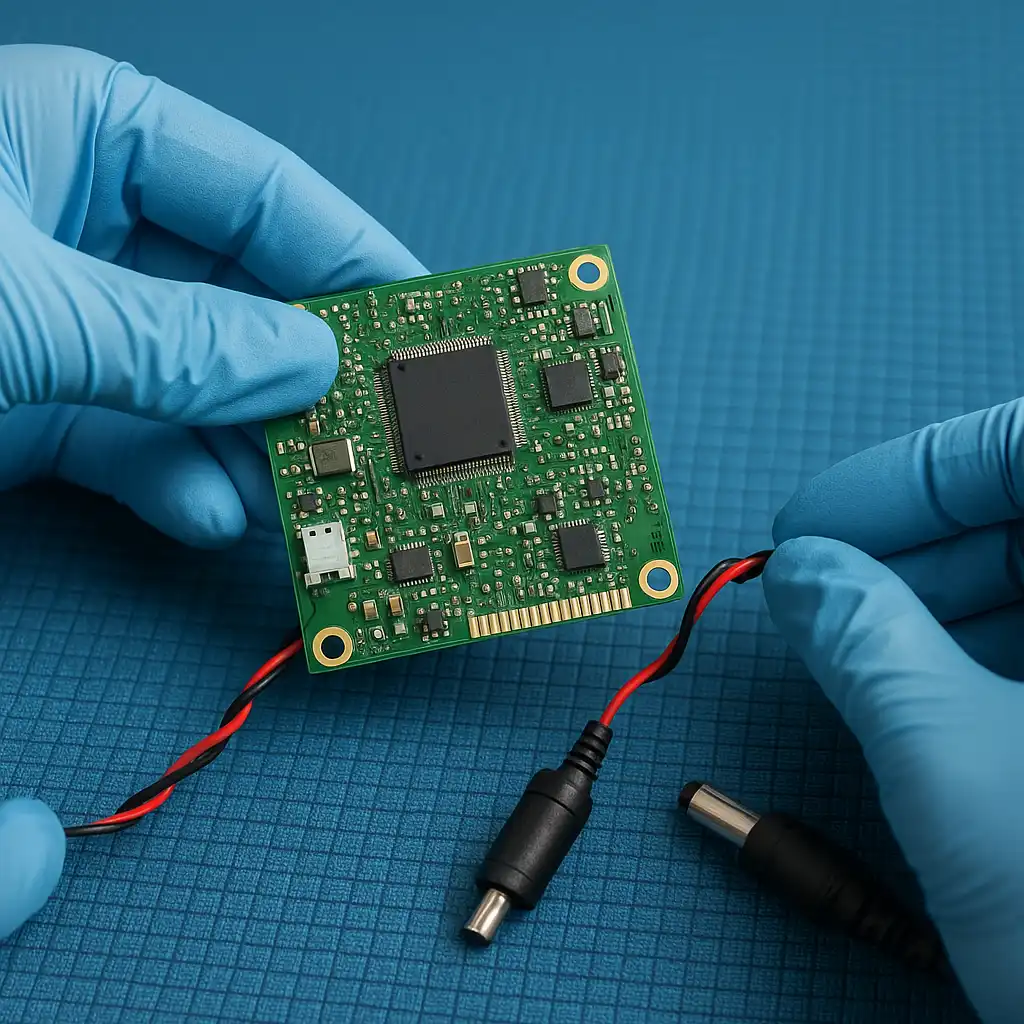
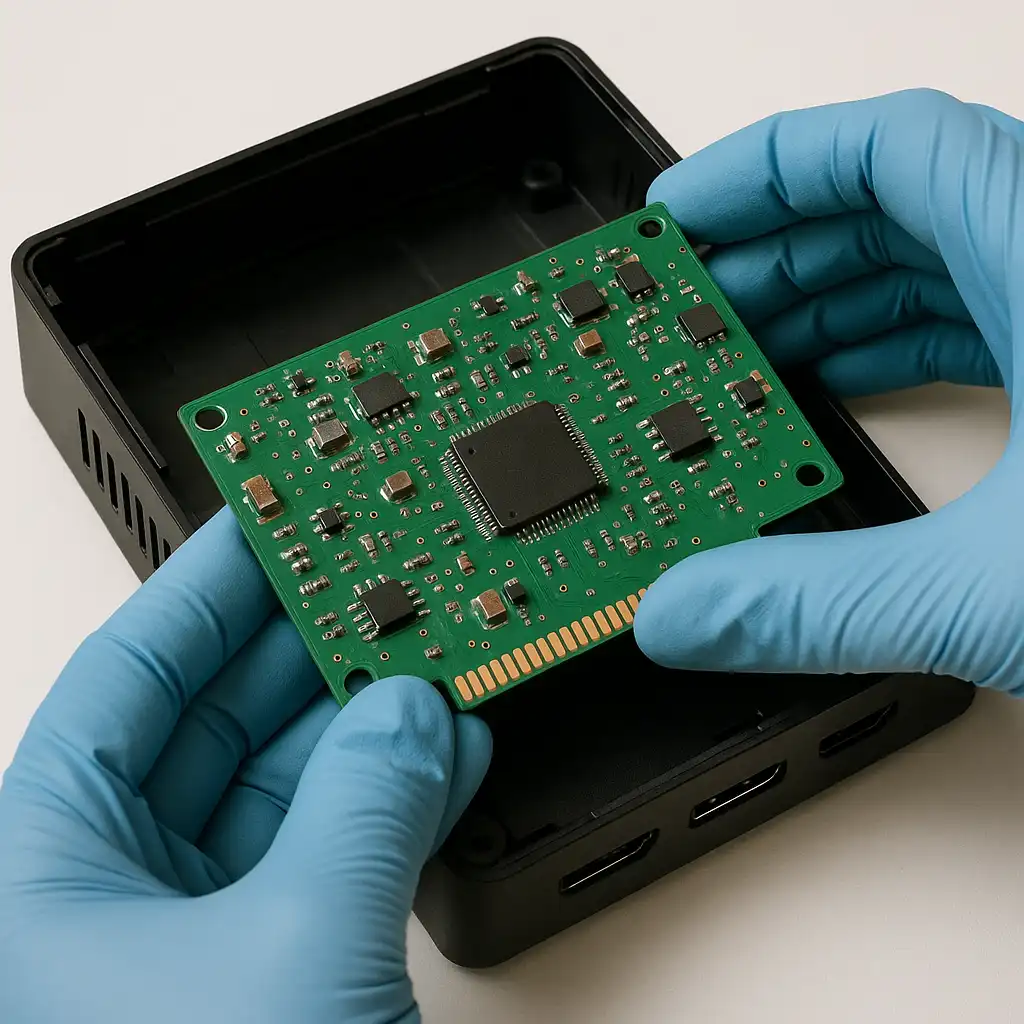
Always begin by turning off the power and unplugging the PCB from any source of electricity. If the board is part of a larger device, carefully remove it so that both sides are accessible. Cleaning a powered or connected board can result in severe electrical damage—or even personal injury—so this step is non-negotiable.
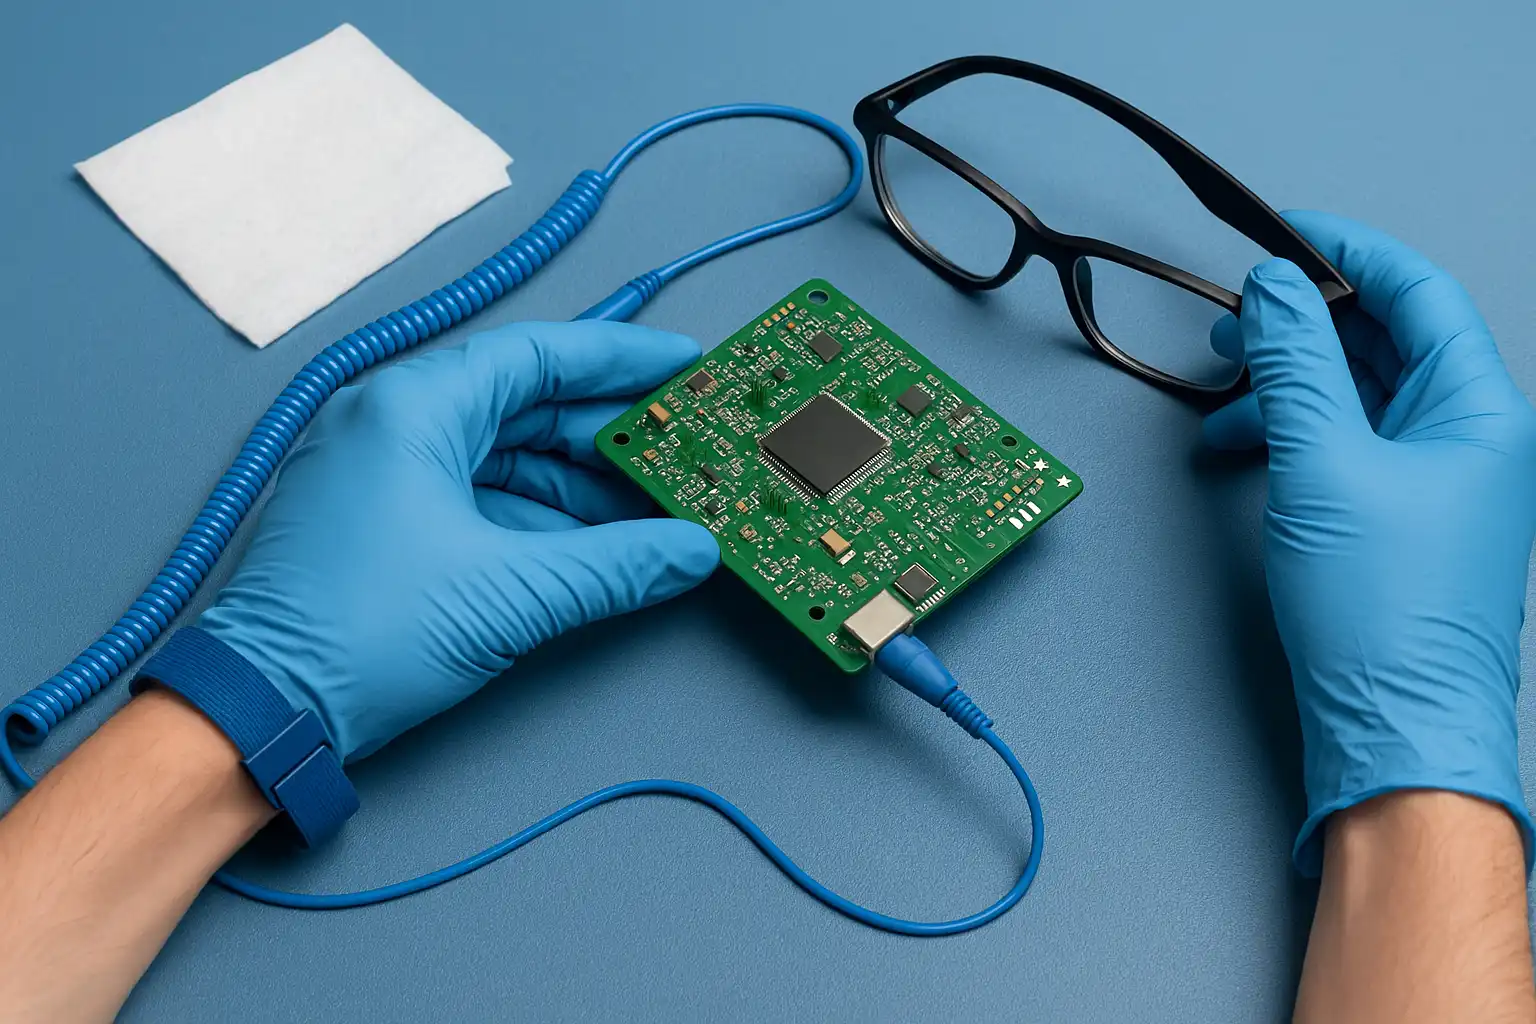
Step 2: Prepare Your Workspace and Safety Gear
Set up a static-free, well-lit workspace. Use anti-static gloves and wear an ESD (electrostatic discharge) wrist strap to protect sensitive components. Ensure proper ventilation, especially if you’re using isopropyl alcohol or commercial cleaners. Place the PCB on a clean, non-conductive surface to begin.
Step 3: Dry Cleaning (Optional Pre-Clean)
If the board has visible dust or loose particles, use a can of compressed air to blow away debris. Follow up with a soft, anti-static brush to gently sweep away any remaining dust, especially in tight areas like between pins and connectors. This step is a safe and effective way to clean lightly contaminated PCBs without applying moisture.
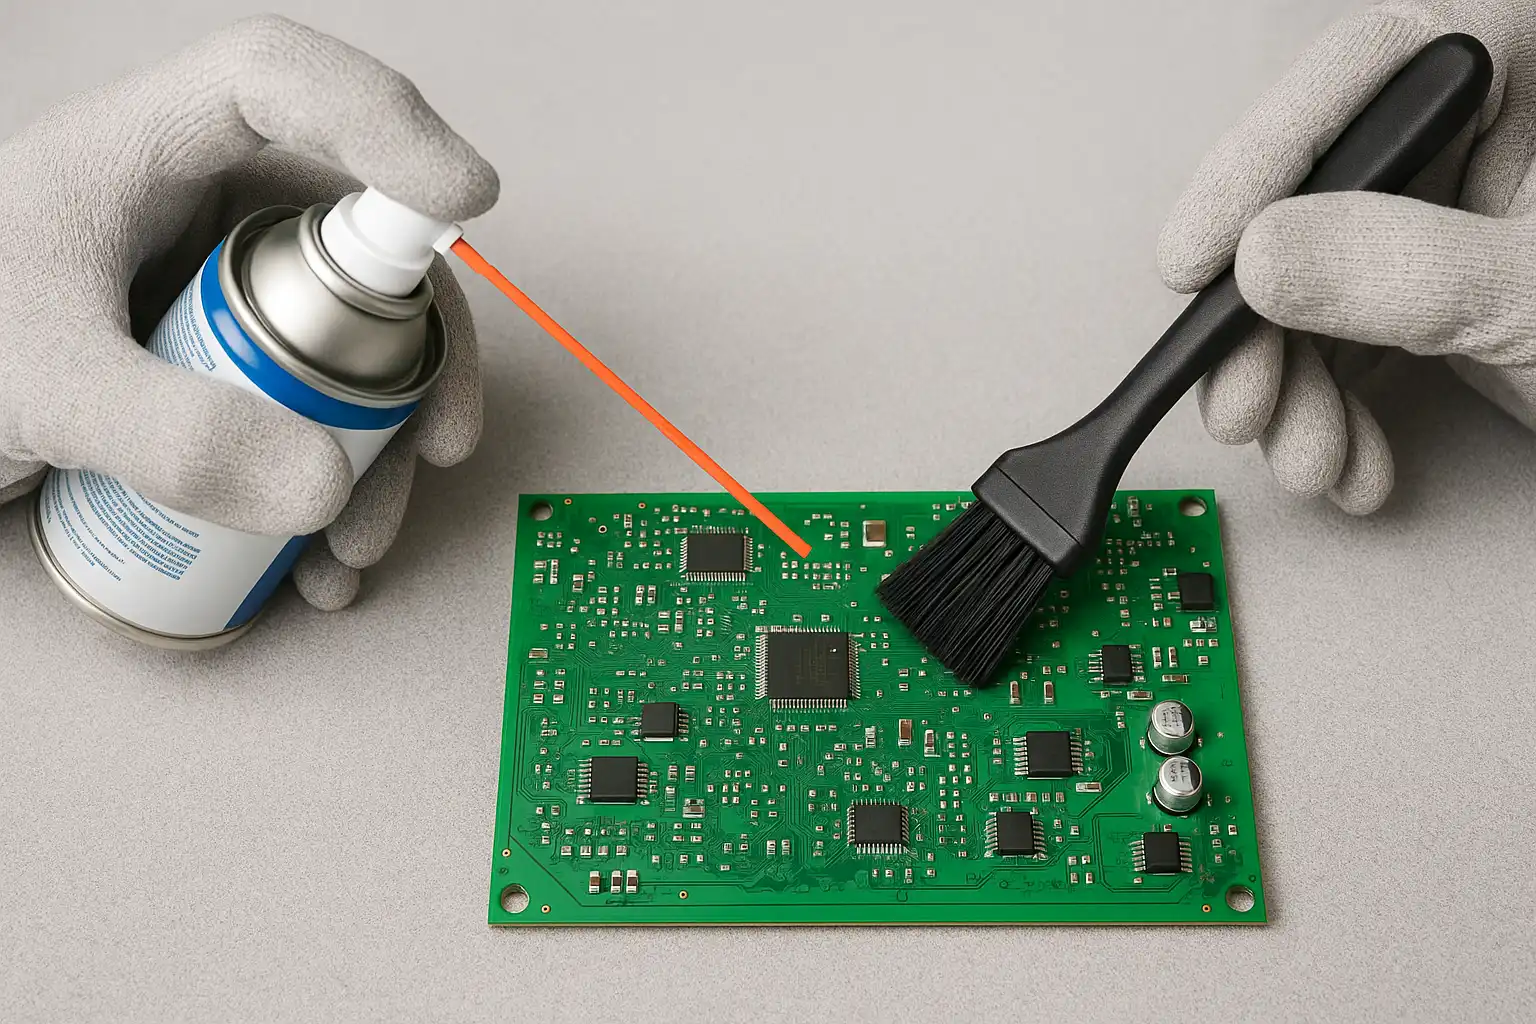
Step 4: Apply Cleaning Solution
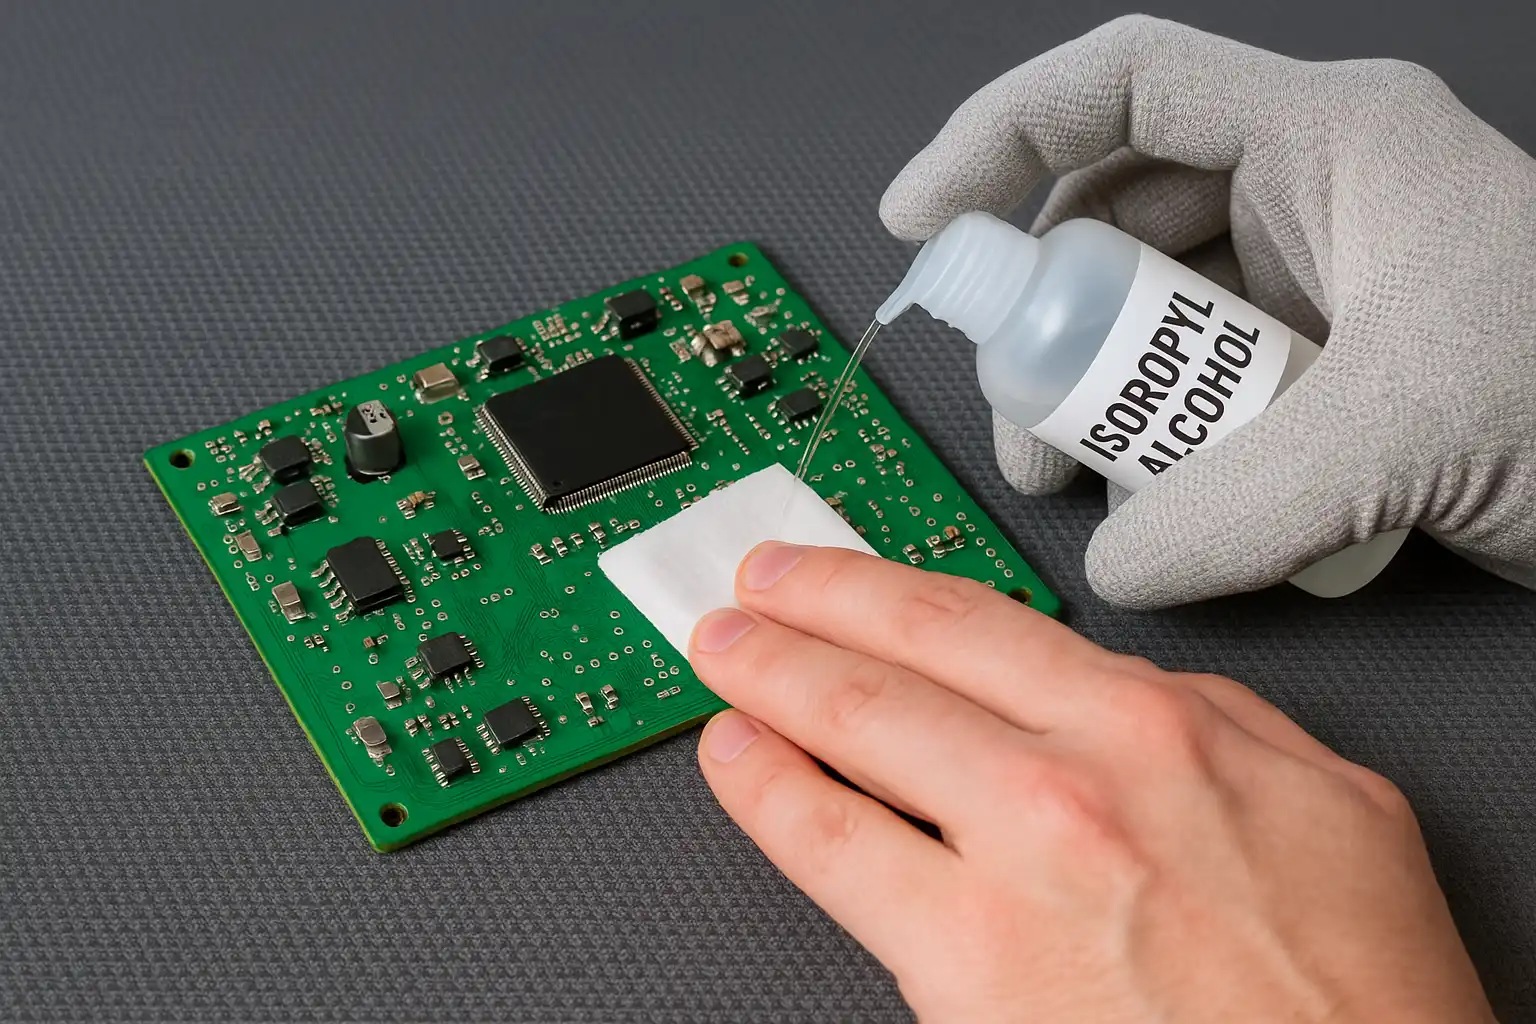
Dampen a lint-free cloth, foam swab, or anti-static brush with high-purity isopropyl alcohol (90% or higher). Gently wipe or dab contaminated areas, focusing on solder joints, IC legs, and areas with visible residue. Work in small sections and avoid oversaturating the board—less is often more when applying cleaning fluids.
Step 5: Agitate and Scrub
For areas with stubborn dirt, flux residue, or grease, use a soft-bristled brush dipped in alcohol to gently scrub the affected zones. Apply light, consistent pressure and move in a circular motion to dislodge buildup without damaging surface-mounted components. Be especially cautious near delicate parts like capacitors, coils, or connectors.
Step 6: Rinse and Remove Residue
After scrubbing, use a fresh cloth or swab soaked in alcohol to wipe away any loosened contaminants. If the board is heavily soiled, a second rinse with isopropyl alcohol or deionized water may be necessary. Avoid letting liquid pool or sit on the board for too long—immediate removal is best for sensitive electronics.
Step 7: Dry the PCB Thoroughly
Proper drying is critical. Use compressed air to blow out moisture trapped under components, then allow the board to air-dry for at least 30 minutes. For more thorough results, use a warm air dryer or drying oven set between 60–100 °C (140–212 °F). Make sure the board is completely dry before testing or reinstalling it.
Step 8: Final Inspection
Once dry, carefully inspect the PCB under a magnifying glass or microscope. Look for missed residue, signs of corrosion, or any physical damage that may have occurred during cleaning. Ensure all connectors and components are firmly in place and that no conductive debris remains on the board.
Step 9: Test and Reassemble
Reconnect the PCB in its device or test environment. Power it on and watch for unusual behavior such as overheating, noise, or failure to boot. If everything operates as expected, you've successfully cleaned your PCB. You can now reassemble the device and return it to service with confidence.
Component-Specific Cleaning Precautions
While general PCB cleaning techniques apply to most boards, certain components require special handling due to their sensitivity to moisture, static electricity, or mechanical stress. Ignoring these precautions can lead to latent defects, corrosion, or complete failure. Here's how to clean different types of components safely and effectively.
1. Connectors and Sockets
Risks: Residue buildup inside pin sockets, corrosion on contact surfaces, or damage from aggressive brushing.
Cleaning Tips:
- Use a foam swab with isopropyl alcohol to gently clean inside connectors.
- Avoid excessive moisture that can seep into tight pin areas and take longer to dry.
- Let air or compressed air fully dry the inside of USB, HDMI, or edge connectors before reconnecting devices.
2. Coils and Inductors
Risks: Moisture trapped under windings, corrosion at the base, or shifting from mechanical scrubbing.
Cleaning Tips:
- Use a soft brush and alcohol for surface grime.
- Do not soak; limit liquid exposure to avoid undercoil absorption.
- Allow extended drying time or use low-temperature ovens (≤ 100 °C) if moisture is suspected underneath.
3. Electrolytic Capacitors
Risks: Residual cleaning solvents can degrade the rubber vent seal, causing leakage or premature failure.
Cleaning Tips:
- Wipe around (not over) the top of electrolytic capacitors.
- Never submerge electrolytic caps in liquid or use ultrasonic cleaning unless specified safe by the manufacturer.
- Dry thoroughly—especially around the base seal.
4. Integrated Circuits (ICs) and BGA Packages
Risks: Moisture can become trapped under surface-mount ICs or ball grid arrays (BGAs), causing shorts when powered.
Cleaning Tips:
- Use minimal liquid and gently wipe around ICs.
- Compressed air can help dislodge debris or cleaning solution from tight gaps.
- For critical applications, use a controlled drying process—such as 24 hours at 60–100 °C or vacuum drying to eliminate trapped moisture.
5. Microphones, Buzzers, and MEMS Sensors
Risks: These components are not sealed and can be damaged by even minimal exposure to liquid or solvents.
Cleaning Tips:
- Avoid direct contact with alcohol or water.
- Use dry cleaning methods only (air blower or anti-static brush).
- If contamination is present, consider replacing the component instead of cleaning it.
6. Crystals and Oscillators
Risks: Fragile leads and glass-sealed packages are vulnerable to vibration and temperature shock.
Cleaning Tips:
- Do not scrub or apply mechanical force.
- Use light brushing and blotting only.
- Avoid thermal shock during drying—allow ambient air-dry or low-heat methods.
7. Battery Holders and Coin Cells
Risks: Residual moisture near battery terminals can lead to corrosion or short circuits.
Cleaning Tips:
- Always remove batteries before cleaning.
- Clean holders with dry swabs or a cloth dampened with alcohol.
- Let dry completely before reinstalling the battery.
Bonus Tip: Avoid Ultrasonic Cleaning on Sensitive Parts
While ultrasonic cleaning is effective for heavy contamination, avoid using it with:
- Socketed components
- Electrolytic capacitors
- Relays
- MEMS sensors
Unless the part's datasheet explicitly states it is ultrasonic-safe, use manual methods only.
By applying these component-specific precautions, you'll reduce the risk of accidental damage and ensure a thorough, safe cleaning process for your PCB. In the next section, we'll cover safety and risk management tips for solvent handling, drying, and static protection.
Safety and Risk Control
Cleaning a PCB isn't just about removing dirt—it's also about doing it safely. Improper handling of tools, chemicals, or static-sensitive components can cause harm to both the user and the circuit board. This section outlines key safety precautions and risk management strategies to ensure a clean, damage-free, and hazard-free process.
1. Chemical Safety: Handling Isopropyl Alcohol and Solvents
Isopropyl alcohol (IPA) and other cleaning agents are flammable and should always be handled with care.
Key safety tips:
- Work in a well-ventilated area or use a fume extractor to prevent inhalation of fumes.
- Keep solvents away from open flames, heat sources, and sparks—IPA vapors are highly flammable.
- Always store chemicals in properly labeled containers and keep them sealed when not in use.
- Wear nitrile gloves and safety goggles to avoid skin and eye contact.
- Dispose of used wipes and swabs in a metal container with a lid to reduce fire risk.
2. Electrostatic Discharge (ESD) Prevention
Even a small static discharge can damage or destroy sensitive electronic components on a PCB.
How to protect against ESD:
- Wear an anti-static wrist strap grounded to a safe point.
- Work on an ESD-safe mat or surface.
- Avoid wearing clothing that generates static, such as wool or synthetic fabrics.
- Keep humidity in the workspace between 40% and 60% to reduce static buildup.
3. Proper Drying: Eliminate Moisture Risks
Residual moisture is a hidden threat that can cause short circuits, corrosion, and component failure when the board is powered back on.
Drying best practices:
- Use compressed air or air blowers to force liquid out from under components.
- Allow boards to air-dry for at least 30 minutes after cleaning.
- For high-reliability applications or water-sensitive parts, dry in a low-temperature oven (60–100 °C) for several hours.
- Never power a PCB until you're 100% certain it's dry.
4. What Not to Do When Cleaning PCBs
To avoid costly mistakes, avoid these common cleaning errors:
- Don't use tap water—it leaves conductive mineral residues.
- Don't use acetone or harsh chemicals—these can damage plastics and labels.
- Don't scrub too hard or use metal brushes—these can lift traces or knock off components.
- Don't reassemble or power on the PCB while it's still damp.
5. Personal Safety and Workspace Preparation
Create a workspace that's optimized for both safety and efficiency:
- Ensure adequate lighting to inspect fine contaminants or damage.
- Keep a fire extinguisher (Class B for flammable liquids) nearby if working with solvents.
- Place all tools and cleaning agents within easy reach to avoid accidents.
- Post safety data sheets (SDS) for all chemicals used in your workspace.
Maintaining proper safety protocols is just as important as the cleaning process itself. Not only will it protect your electronics, but it also safeguards your health and workspace.
In the next section, we'll explore cleaning recommendations for high-frequency, high-reliability, or specialty PCBs that demand extra care and validation procedures.
Recommendations for High-Frequency and High-Reliability Environments
Not all PCBs are created equal. Boards used in high-frequency, mission-critical, or harsh environments—such as medical devices, aerospace systems, automotive electronics, RF applications, and industrial controls—require stricter cleaning protocols and verification. Even minimal contamination can lead to performance degradation, interference, or total failure in these contexts.
This section outlines best practices for cleaning PCBs used in environments where reliability, signal integrity, and long-term stability are essential.
1. High-Frequency Circuits (RF/Microwave PCBs)
Why it matters: At high frequencies (GHz range), even microscopic residues can cause signal reflections, impedance mismatches, and electromagnetic interference (EMI).
Recommendations:
- Use high-purity isopropyl alcohol (≥99%) to ensure no residue remains.
- Avoid "no-clean" flux unless absolutely necessary, and clean it off if possible—even if labeled non-conductive.
- Clean both sides of the board, especially around RF shields, microstrip lines, and coaxial connectors.
- Use lint-free wipes and ensure zero fiber contamination.
2. High-Reliability Applications (Medical, Automotive, Aerospace)
Why it matters: PCBs in these industries must operate continuously under stress, temperature extremes, and vibration, with no margin for failure.
Recommendations:
- Always remove flux residues, even from "no-clean" processes. Residue can attract moisture and cause corrosion over time.
- Implement a double-cleaning cycle: a primary IPA scrub followed by a deionized water rinse and second IPA wipe.
- Use a low-temperature drying oven (60–100 °C) to ensure complete moisture removal, especially under ICs and BGAs.
- Validate cleaning with ionic contamination testing (e.g., ROSE or ion chromatography) for critical boards.
3. Harsh or Moisture-Prone Environments
Why it matters: In environments exposed to moisture, salt, or dust (e.g., marine, outdoor IoT), cleanliness directly impacts corrosion resistance and board longevity.
Recommendations:
- After cleaning and drying, consider applying a conformal coating (acrylic, urethane, or silicone-based) for added protection.
- Before coating, ensure the PCB is 100% clean and dry—any trapped contaminant will worsen over time.
- Avoid hydrophilic solvents and always rinse with deionized water if used.
4. Validation and Cleanliness Standards
For regulated industries, PCB cleaning must align with recognized standards, such as:
- IPC-A-610: Acceptability of Electronic Assemblies
- IPC-TM-650: Test methods for cleanliness and contamination
- MIL-STD-2000: For military-grade electronics
Best Practice:
- Perform visual inspection under magnification for all high-reliability boards.
- Use blacklight inspection if fluorescent flux was used to detect any residue.
- Document the entire cleaning and inspection process for traceability.
Summary: High-Reliability Cleaning Essentials
| Environment Type | Key Actions | Optional Add-Ons |
|---|---|---|
| RF / Microwave | Ultra-pure IPA, double rinse, no “no-clean” flux | Magnified inspection |
| Aerospace / Medical | Strict drying, ionic testing, no flux residue | Conformal coating |
| Harsh / Moisture Zones | Full rinse & dry + protective coating | Desiccant storage post-clean |
Proper PCB cleaning in high-frequency or mission-critical applications is not optional—it's a non-negotiable part of product integrity. By following these best practices, you reduce the chance of failure, ensure long-term reliability, and meet stringent industry standards.
In the next section, we'll cover routine maintenance tips and troubleshooting for keeping your boards clean and functioning over time.
Maintenance & Troubleshooting
Cleaning a PCB isn't just a one-time task—it should be part of an ongoing preventive maintenance strategy. Regular inspection and proper care can significantly reduce the risk of electrical failure, signal degradation, and unexpected downtime. In this section, we'll explore how to maintain clean PCBs over time and troubleshoot common problems that can arise due to contamination or cleaning mistakes.
1.Routine Cleaning Schedule
Why it matters: Dust and residues gradually build up, especially in high-usage or dusty environments.
Recommendations:
- Consumer electronics (e.g. computers, routers): inspect and clean every 6–12 months.
- Industrial or high-reliability systems: clean quarterly or as part of regular service intervals.
- Harsh environments (moisture, dust, high heat): inspect monthly and clean as needed.
Pro Tip: Use a log to track last-cleaned dates and any observed changes in PCB condition.
2. Visual Inspection Tips
Before cleaning, always perform a visual check under good lighting or magnification.
What to look for:
- Dust accumulation near fans and connectors
- Dark or burnt areas (possible overheating)
- Sticky flux residue around solder joints
- Corrosion near capacitors or pins
- Discoloration or signs of moisture exposure
Tools to use:
- Magnifying glass or digital microscope
- UV light for detecting flux or fluid traces (if fluorescent)
3. Common Cleaning Mistakes to Avoid
Understanding where cleaning efforts go wrong can help you avoid unintended damage:
| Mistake | Consequence | How to Avoid |
|---|---|---|
| Using tap water | Leaves mineral deposits, causes corrosion | Use deionized water only |
| Not fully drying the board | Can lead to short circuits or corrosion | Use compressed air + proper oven drying |
| Over-scrubbing with hard brushes | Lifts pads, damages traces | Use ESD-safe soft bristle brushes |
| Using aggressive chemicals | Destroys labels, plastics, seals | Stick to IPA or PCB-safe cleaners |
| Cleaning while the board is powered | Instant component damage | Always power down before cleaning |
4. Troubleshooting Post-Cleaning Issues
If your PCB doesn't function as expected after cleaning, use the following checklist:
| Symptoms | Possible Causes | Fixes |
|---|---|---|
| Board won't power on | Moisture under components | Dry thoroughly, recheck with thermal camera or humidity test |
| Short circuits | Residual flux or conductive debris | Inspect under magnifier and re-clean affected areas |
| Component heating up | Corroded pin or poor contact | Reflow solder joint, inspect solder pads |
| No signal / poor connectivity | Damage during scrubbing or unplugging | Check traces, re-solder if necessary |
| Flickering or glitches | ESD damage | Replace affected IC if testing confirms failure |
5. Preventive Maintenance Tools
For optimal PCB health, keep the following tools in your maintenance kit:
- Anti-static brush
- Compressed air canister or ESD-safe air blower
- High-purity IPA (≥90%)
- Cotton swabs or foam applicators
- Lint-free wipes
- ESD wrist strap and mat
- Digital multimeter for basic diagnostics
- Moisture indicator cards (for sensitive environments)
FAQs
Can I use 70% isopropyl alcohol to clean a PCB?
Yes, but it's not ideal. 70% IPA contains 30% water, which can increase the risk of corrosion or leave moisture behind. For best results, use 90% or higher purity isopropyl alcohol, as it evaporates faster and leaves no conductive residue.
How do I know if my PCB is completely dry after cleaning?
A board is considered dry when:
ㆍThere's no visible moisture, even in crevices.
ㆍIt has air-dried for at least 30 minutes or been oven-dried at 60–100 °C for 1–2 hours.
ㆍYou've used compressed air to blow out liquid from under components.
Is ultrasonic cleaning safe for all PCBs?
No. While ultrasonic cleaners are great for removing deep contaminants, they can damage delicate components like:
ㆍElectrolytic capacitors
ㆍMEMS sensors
ㆍRelays and socketed parts
Always consult the component datasheet, and avoid ultrasonic cleaning unless you're certain it's safe.
Should I remove "no-clean" flux from my PCB?
If your board is used in high-frequency, high-reliability, or moisture-prone environments, then yes, even "no-clean" flux should be removed. It can still attract dust, retain moisture, and degrade over time.
For hobbyist or one-off builds in dry environments, it's often acceptable to leave it—though cleaning still improves appearance and inspection.
Can I use water and dish soap to clean a PCB?
This method is not recommended unless you're in an emergency and can:
ㆍUse deionized water (not tap water)
ㆍRinse thoroughly with isopropyl alcohol afterward
ㆍDry thoroughly before applying power
Even then, water-based cleaning is riskier and best reserved for non-critical or already-damaged boards.
What's the safest way to clean a PCB at home?
The best home-friendly PCB cleaning method is:
1. Use 99% isopropyl alcohol
2. Apply with a foam swab or lint-free wipe
3. Scrub gently with a soft anti-static brush
4. Let it air dry or blow dry with compressed air
Wear gloves and work in a well-ventilated area to protect both the board and yourself.
How often should I clean my PCB?
It depends on the usage environment:
ㆍHome electronics: once or twice per year
ㆍIndustrial or dusty environments: every 1–3 months
ㆍHigh-reliability systems: during each scheduled maintenance cycle
Is it safe to clean a PCB while it's plugged in?
Absolutely not. Cleaning a powered PCB is dangerous and can:
ㆍShort components
ㆍCause electrical shock
ㆍDamage the board permanently
Always disconnect power and remove batteries before starting.
What should I do if my board still doesn't work after cleaning?
ㆍReinspect for moisture under chips
ㆍLook for lifted pads, corrosion, or cracked traces
ㆍTest components with a multimeter
ㆍReflow solder joints if necessary
ㆍIf issues persist, consider professional repair or replacement